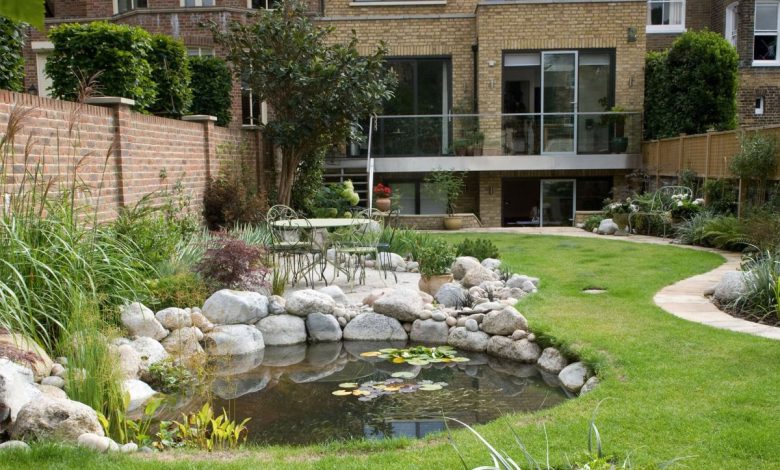
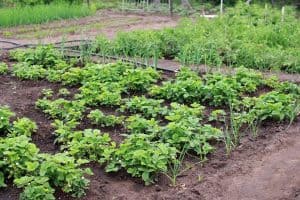
How to Organize a Garden of 80 meters: [Steps to follow]
Organizing a garden is a very important task when we want it to produce a good amount of harvest.
 It is key to define spaces, access to light, water, wind control, the behavior of the plants to be planted, among others.
An 80-meter orchard should give more than enough space to plant some species that a family may need for its annual consumption.
That is why it is so interesting to know this information, because if you have the space, nothing prevents you from having your fresh products at home. Shall we start?
Step 1. Make a list of everything you want to plant in your garden
 Before we begin to define where each thing will go, it is essential to know what type of crops we are going to carry out and some more information about them.
For example, it is necessary to separate vegetables or fruits by season, establishing the time it will take for each one to generate fruit.
This is called life cycles and will be key to facilitating transplant times and crop harvesting. It will also be necessary to define the type of care they require and the associations that are favorable between them. This last aspect of associations will help us:
- Make better use of the land.
- Make it easier for plants to be healthier.
- Ensure that they will receive a good amount of nutrients.
Step 2. Draw a plan of your garden
The plan of the orchard can be made on a normal white sheet of paper, establishing in each section the type of sowing that we are going to carry out.
It is important at this point to look at the conditions that each species needs to grow well, because not all need the same amount of light, for example.
Some specialists recommend relying on watering needs because it will save a good amount of time each day.
Step 3. Evaluate the amount of material you will need to organize your garden
 This section seeks to establish how much material you will need to cover each space, according to what step two of the plan design yields.
In favor of this, you will have to verify substrate, fertilizers, liquid fertilizers, seeds or seedlings, among others.
It will also be necessary to have all the tools that are essential for this job such as gloves, pruning shears, etc.
Evaluate the use of a hose that reaches you to reach 80 meters or establish water connections in key places for greater ease of use.
Step 4. Create a calendar
A paper calendar or diary will be the safest way for everything to go well from day one. For this we will have to observe well some characteristics of the plants to be sown, such as:
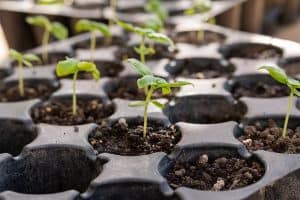
- If they use seedbed germination and how long it will take.
- The moment in which the seedlings should be transferred to pots and the care they should have.
- The appropriate time to transplant and how its use will influence other species.
This step is decisive because it will be the one that ensures that a plant that is ready to transplant has the space it needs. The truth is that you do not want to delay or advance any process because that could affect the production capacity of the plants.
In addition, it also makes them more vulnerable to the presence of pests and diseases. It is better to respect the times. One of the biggest advantages of the calendar is that it allows you to alternate planting short periods and harvesting crops almost at the same time.
For example, if you have a vegetable that needs 2 months to harvest and another that takes 4 months, you can carry out two cycles of the first while you wait for the second to be ready.
Step 5. For the next period, rotate the crops
 Already after you have gone through the 5 steps above for the first time, successive planting periods will be easier to organize.
We must pay attention to an important requirement of land care and this is crop rotation. It means that the same species that you planted in one space are not the same as the next.
You should not repeat the carrot planting in the same square meter, for example. This is because each type of plant species needs a certain amount of nutrients and, by rotating, we make sure that they are not consumed in excess.
On the other hand, crop rotation helps prevent the appearance of pests and diseases that can cause damage to each species.
Step 6. Transfer the design of your garden made on paper to reality
 In this last step, what you will have to do is make the design that we already made in step 2 come true.
It is possible that there will be some slight variations at some point because the paper is not the same as the land itself.
But, in most cases, you should be able to recreate a very similar reality. And ready. With this information, having your 80-meter orchard just as you would like will be very possible.
Bibliography and references
- Well, Mariano. (2015). The organic family garden. The great practical guide to natural cultivation. RBA Books. Barcelona, Spain.
- Biggs, Tony. (1990). The secrets of the orchard. Folio Editions. Barcelona, Spain.
- Maneru, Maria. (2014). The garden at home. Editorial Libsa. Madrid Spain.
- Rivas Platero, Gonzalo Galileo; Rodriguez Cortes, Angela Maria. (2013). The family garden: some considerations for its establishment and management. Tropical Agricultural Research and Teaching Center (CATIE). Turrialba-Costa Rica. Reproduced from: https://www.researchgate.net/profile/GONZALO_GALILEO_RIVAS_PLATERO/publication/256293271_El_huerto_familiar_algunas_consideraciones_para_su_establecimiento_y_manejo/links/0c9605221e60574d76000000.pdf
- González-Araya, Marcela C.; Soto-Silva, Wladimir E.; Acosta Mirror, Luis G. (2012). Model for crop planning in apple orchards. Latin-Iberoamerican Congress of Operations Research; Brazilian Symposium on Operational Research. Rio de Janeiro Brazil. Reproduced from: https://www.researchgate.net/profile/Marcela_Gonzalez-Araya/publication/266260726_MODELO_PARA_LA_PLANIFICACION_DE_COSECHAS_EN_HUERTOS_DE_MANZANAS/links/5541a1cd0cf2322227317032.pdf
![Photo of Calibrachoa: [Planting, Care, Irrigation, Substrate and Pests]](https://www.complete-gardening.com/wp-content/uploads/2022/08/calibrachoa-planting-care-irrigation-substrate-and-pests-390x220.png)

![Photo of Iron in the Garden: [Use, Excess, Lack, Advantages and Disadvantages]](https://www.complete-gardening.com/wp-content/uploads/2022/08/iron-in-the-garden-use-excess-lack-advantages-and-disadvantages-390x220.jpg)