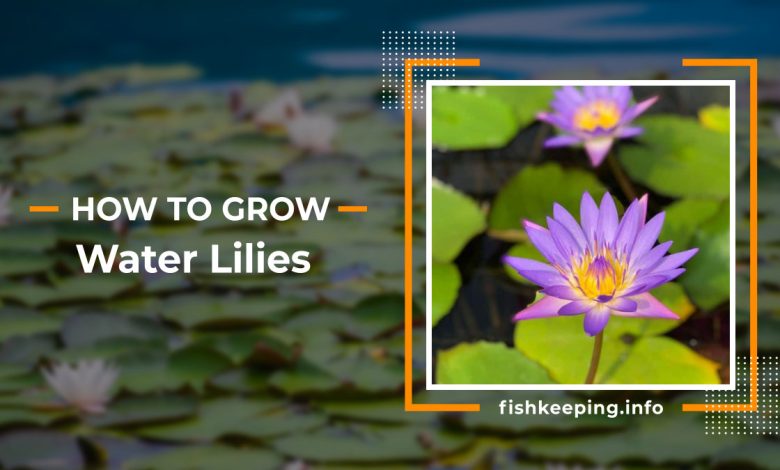
How to Plant Water Lilies: Important Points + Pictures + [9 Steps]
Important points to Plant Water Lilies:
 When? In Autumn or Spring.
- Where? Water lilies are very resistant and undemanding species. However, they prefer open, sunny sites and calm, warm waters.
- What substrate do you need? Clayey and rich in humus.
- What kind of water do you want? They require clean and oxygenated water. They grow best in still water, as in nature they prefer to grow in stagnant water.
- How do we sow step by step? Here.
- What pests and diseases attack you? The water lily aphid, Beetle Galerucella Nymphaeae and Pythium.
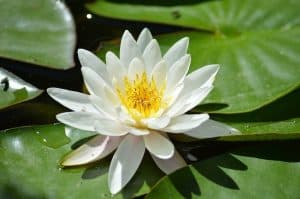
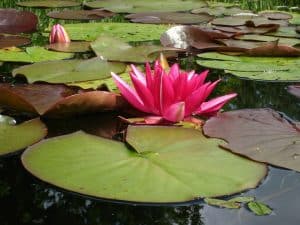
water lilies or water liliesThey are widely used as ornamental plants. They are perennial plants, belonging to the Nymphaeaceae family, of different shades and shapes, according to their various varieties.It is a very pretty flower.
 They have their origin in the lakes of Africa and in some countries of Asia as wild flowers. One of its main characteristics is that it has two types of leaves, some are under the water, while the others are large and float on the surface.
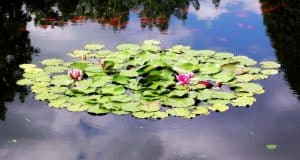
The latter, in addition to providing protection to fish and other aquatic organisms, also help control the excessive growth of algae.
Its roots can measure up to 5 meters, which is why it is possible for this plant to develop in waters of considerable depth.
In general terms, its cultivation is simple, but it requires a considerable investment of time. In addition, space is needed for the plant to spread its roots freely, so they are not highly recommended if the ponds are small or shallow.
What do we need to plant water lilies?
When should they be sown?
They can be sown duringautumn or spring.
They bloom in summer.
Where should we plant water lilies?
In general, water lilies are very hardy and undemanding species. However, they prefer open, sunny sites and calm, warm waters.
Regarding sun exposure, a minimum of6 hours a day of direct sunfor good development and proper flowering.
For those regions with temperate climates, the best are perennial lilies, which usually bloom in the fall. Those of Tropical climate, lose their leaves in winter.
The optimal water temperature is between 18 and 22 ºC, depending on the variety.
What kind of water do they prefer?
 require ofclean and oxygenated water. They grow best in still water, as in nature they grow preferably in stagnant water.
The optimal pH ranges between 5.5 and 8.0, although it is recommended to keep it neutral.
The depth of the water is also an important factor for growing water lilies. As a general rule, small varieties need between 20 and 40 cm of depth, while medium varieties need between 40 and 60 cm.
Finally, the largest varieties need between one meter and 120 cm, measured from the basket where we place the roots to the top level of the water.
What type of substrate is the best?
They prefer relativelyclayey and rich in humus.
How to plant water lilies step by step
Step 1: File the seeds
If you plant water lilies from seed, you will need to file them down along the edges, being very careful not to touch the tips, as that is where the plant emerges.
Use a metal file and file down to the light brown layer below the outer layer. If you don’t do this, the seed won’t germinate and will end up rotting.
Step 2: Put the seeds in water
 Once you have filed the seeds, place them in a glass of warm water until they germinate.You will need to change the water daily.
In addition, you must ensure that the water does not have chlorine.
Keep in mind that the seeds should not float, but should sink to the bottom of the glass. Otherwise, it means they are infertile.
The seeds should germinate at the end of the first week. Continue changing the water, until the shoots reach 15 centimeters in length.
When changing the water, be careful not to disturb the growth of recent shoots.
Step 3: Anchor the seeds
Lily buds can grow out of the ground and end up floating on the surface of the water. To avoid this, they require anchoring.
Gently wrap each seed with a small amount of playdough. You should only cover the seed, never the sprout.
Step 4: Fill a pot with soil
 You can use a bucket of approximately 20 liters. Preferably dark, so that it retains heat better.
Check that there are no holes anywhere.
Add soil up to 15 centimeters. The ideal mix is to add two parts clay to the bottom and then a third part river sand.
Step 5: Place the seeds in the substrate
Insert the seeds covered by the plasticine into the substrate, taking care that the sprout protrudes. Once you’ve done that, lightly cover the seed.
Step 6: Submerge the container
Place the pot in a shallow pond. Although the depth may vary, depending on the height of the container, it is recommended that the edge of the pot should be flush with the water.
The plant will be ready for deeper water once the petioles show their leaves.
Small lilies only need 1 to 6 inches of water to cover the top of the soil, but larger varieties may need up to 4 feet of water.
Step 7: Prune Your Water Lily When Needed
short andremove the yellow leaves, but it only cuts its stems above the surface of the water.
Step 8: Fertilize Using Pond Tablets
Pond tablets are designed for use with aquatic plants. Small varieties only need about two tablets, but large ones may need up to four.
If you preferuse organic fertilizers, get or make fertilizers based on seaweed or fishmeal. Nettle slurry or earthworm humus can also be useful.
It is not necessary to fertilize during the first year of cultivation.
In subsequent years, add fertilizer every three to four weeks.
Stop fertilizing in mid-July, as the plant prepares for its vegetative period.
Step 9: Relocate the pot
Before the first frost, you will want to move the container to the deepest part of the pond to protect the sprout from the ice that develops on the surface of the water.
Water Lily Pests and Diseases
Some of the most common pests and diseases that affect the water lily are:
Water lily aphid (Rhopalosiphum nymphaeae)
To combat them it is necessary to remove them by hand. This is highly effective, especially if the pond is small.
It can also be done by pressure spraying the leaves so that they fall into the water and are left at the mercy of pond fish and other predators.
Beetle Galerucella Nymphaeae
The treatment is the same as in the previous case.
Pythium
To combat it, the only thing that can be done is to disinfect the soil or use clean and healthy substrates.
![Photo of Irrigation in Indoor Plants: [Basic and Complete Guide]](https://www.complete-gardening.com/wp-content/uploads/2022/08/irrigation-in-indoor-plants-basic-and-complete-guide-390x220.jpg)

![Photo of Crepis Vesicaria: [Characteristics, Cultivation, Care and Disadvantages]](https://www.complete-gardening.com/wp-content/uploads/2022/08/crepis-vesicaria-characteristics-cultivation-care-and-disadvantages.gif)
![Photo of How to Plant Pistachios Step by Step: [Guide + Images]](https://www.complete-gardening.com/wp-content/uploads/2022/08/how-to-plant-pistachios-step-by-step-guide-images-390x220.jpg)