How to install a drip irrigation in the garden or terrace
With the arrival of heat and good weather, it is time to start thinking about installing an irrigation system. One that allows us to keep our plants hydrated when we are absent. One that will also provide us with the comfort of not having to water even when we are at home. Although there are many options and they all have pros and cons, today we want to see how to install drip irrigation.
This method is ideal for planters and pots. A fantastic system so that, despite our oversights, our plants remain alive no matter how much we forget to water them. Something that can even compromise your life now that the hot days are approaching.
Thus and before knowing how to install a drip irrigation, let’s see some of the reasons that can convince us to do so.
ADVANTAGES OF INSTALLING A DRIP IRRIGATION
One of the main advantages of installing drip irrigation is savings. It is estimated that this type of installation helps save irrigation water by up to 80%. An amount that not only allows us to be much more respectful of the environment but also to notice a substantially lower cost in the water bill. Let no one believe that this means watering our plants less. Nothing is further from reality. What drip irrigation really does is optimize water by irrigating in depth. A way to avoid, for example, evaporation of water as a result of heat.
In addition to this, installing drip irrigation will allow us to extend the usefulness of our substrate. As they are light and non-invasive irrigations, the nutrients in the soil are not washed away with excess water. On the contrary: thanks to the fact that this type of irrigation penetrates better into the roots, what we will be doing is promoting the release of these substances so that they can be used by the plants.
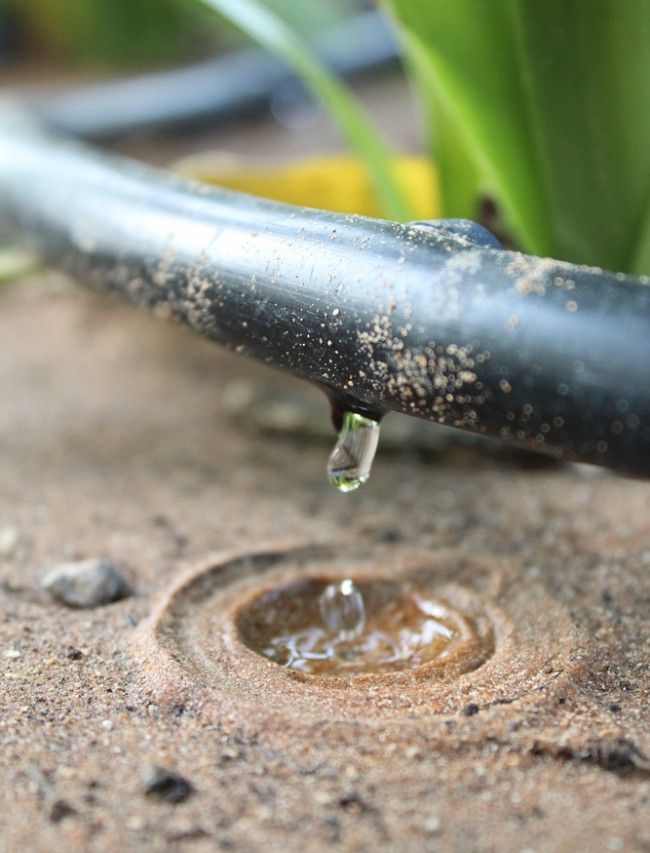
Much of the success of installing drip irrigation lies precisely in the way it moistens the ground. One that avoids wetting the foliage of the plants and, therefore, works in our favor. We refer to those uncomfortable visitors to our garden or terrace, those that appear in the hot months. By directly wetting the substrate, we will be largely avoiding eliminating garden pests. Fungi and insects will be less attracted to plants irrigated with this system due to the lack of humidity in the visible part of the plant.
In addition to these aspects, we end with one that is highly appreciated by gardening lovers. Installing a drip irrigation allows us to forget about the constant task of eradicating weeds. And it is that since it is a much more efficient irrigation, directed to the plant, these upstart plants find more inconveniences to grow.
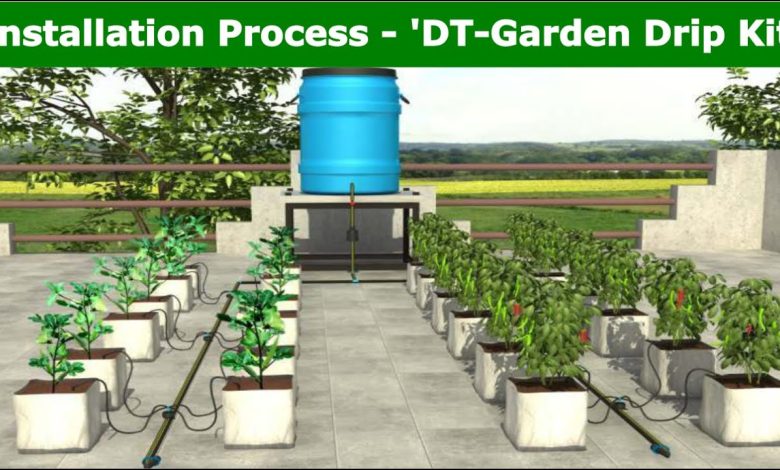
INSTALL A DRIP IRRIGATION, STEP BY STEP
Now that we know the reasons for installing drip irrigation, let’s see how it is done. Contrary to what is believed, its installation is extremely simple. We will only have to take a preliminary precaution: calmly think about what it will be like.
It is important to do this planning task before installing drip irrigation. In this way, we will irrigate in the areas that need water and not in those in which there are no plants that demand it. On the other hand, this exercise will also help us to know how much material we need to carry out the complete installation.
Although we can use kits that include everything necessary to install drip irrigation, sometimes they fall short. And it is that, for larger irrigation surfaces, we will have to consider a larger installation.
In general, both a kit and an installation that we design must have:
- Programmer
- Filter
- pressure reducer
- Hose coupling piece
- Water distribution pipes of 4, and 12 or 16 mm.
- connectors
- drippers pickaxes
With the necessary materials, it is time to get down to work.
1. Adjust the drip irrigation programmer
We will start by placing the programmer on the tap that will supply water to the circuit. It is important that the union between the two is perfect, since the tap will always be open and the programmer will be responsible for regulating the flow of water.
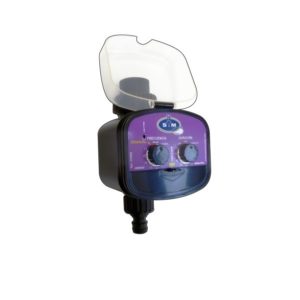
In addition to this, we will also place the filter. One that will help us reduce the limescale in the water and, therefore, make our irrigation water more pleasant for the plants.
2. Place the pressure reducer
Attached to the programmer we will place the end of the distribution tube, which will be between 12 and 16 mm. And, to this, we will attach a pressure reducer and a hose piece. Thanks to the reducer, we will be completely changing the flow of our installation. Something necessary for the installation to work correctly but also so that there are no shocks in the event of pressure surges.
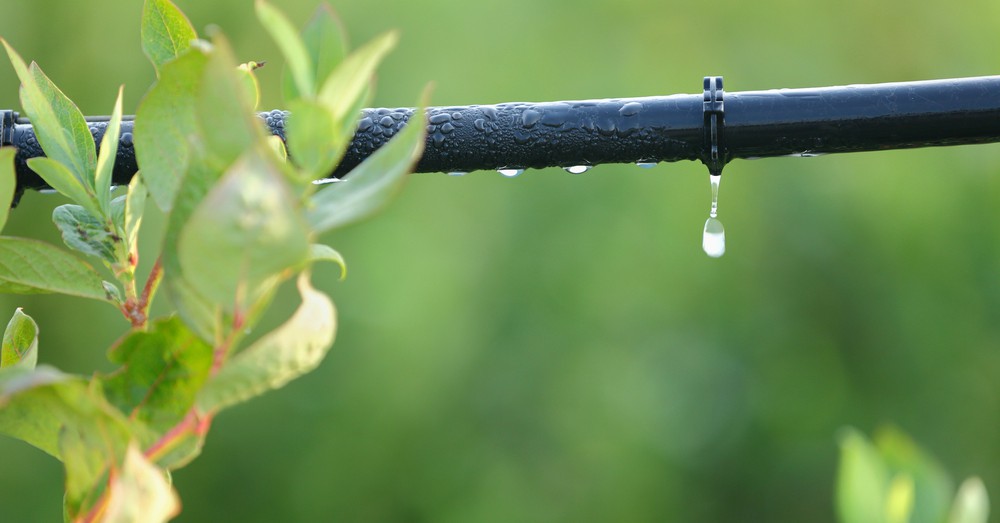
3. Place drippers or distributor tubes
And this is where the most important planning exercise begins! With our main tube supplied with water, it is time to see how it will be distributed over our plants. If we have it clear, we can go drilling the hose to place drippers and pegs that hold it a few centimeters away from the substrate.
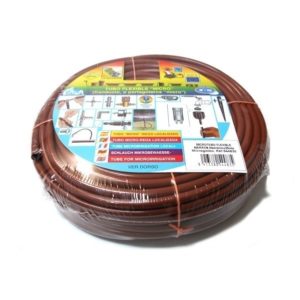
However, if our installation is of good dimensions, the 4 mm distributor tubes will have to come out of those same perforations. thick. Some that will be articulated thanks to the use of connectors in the way we need. In the form of a T, an elbow or thanks to those that are linked, we can lay our irrigation hose without problems.
4. Close the end with plugs
With the entire installation ready for irrigation, all that remains is to finish off the end of it with a plug. A way to seal the circuit that the water will run through.
And, after following these four simple steps to install a drip irrigation, there is only one thing left: program it. In this programming we will choose not only the hours of irrigation but, also, the time of the same.
Something that will free us from the task of watering but, above all, will ensure the most important thing: that our plants do not go thirsty, with or without us nearby.
![Photo of Prune Citrus: [Importance, Season, Tools, Considerations and Steps]](https://www.complete-gardening.com/wp-content/uploads/2022/08/prune-citrus-importance-season-tools-considerations-and-steps-390x220.jpg)
![Photo of Hanging Plants: [Planting, Care, Examples, Irrigation and Images]](https://www.complete-gardening.com/wp-content/uploads/2022/08/2_Lobelia-300x225-1-300x220.jpg)
![Photo of How to Plant Green Beans: Complete Guide [Steps to Follow + Images]](https://www.complete-gardening.com/wp-content/uploads/2022/08/how-to-plant-green-beans-complete-guide-steps-to-follow-images-390x220.jpg)