Cultivate an Urban Garden: Urban Composter step by step

I suppose you have read the post Community garden in Madrid: «El Campo de Cebada», in which I told you how to cultivate an urban garden that Álvaro, my partner from the Agrohuerto TV channel, and I visited a few days ago. Well, here is the second part of our visit to the garden of El Campo de Cebada, in which we learned some of the techniques for cultivating an urban garden: they taught us some tricks about composting and we witnessed the implementation of summer crops, which will provide delicious fresh vegetables in the coming months.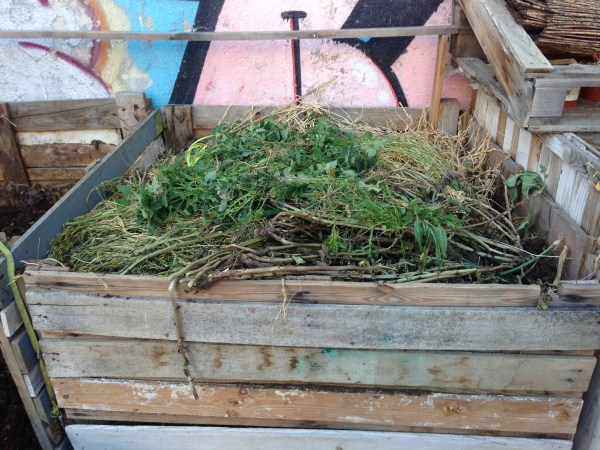
Cultivate an urban garden: the compost bin
Like any self-respecting organic garden, this urban garden is fertilized with compost.
As we saw in the article « How to make compost step by step », it is very convenient that the composter has enough ventilation so that the «compost in process» is in contact with the air and does not rot, that is why the drawers or
composters are made with pallets, since the separations between their slats are used.
In this case, the compost bins -which are two- measure approximately 1 cubic meter each (1 meter long x 1 meter wide, and about a meter high) and are enough to fertilize the eight cultivation tables (4.2 x 1.4 meters) twice a year: before establishing the autumn-winter crops and now, when the spring-summer ones are laid.
soil preparation
The old crops have already been removed and the new vegetables are going to be planted, the spring-summer ones, such as tomatoes, peppers…
But as our friends from Sponsor a tomato also did, it is necessary to loosen the soil before fertilizing so that later the compost and the soil mix well.
Here you can see Álvaro, who in addition to recording, gave a little hand with the hoe on one of the terraces where they were going to put the new crops.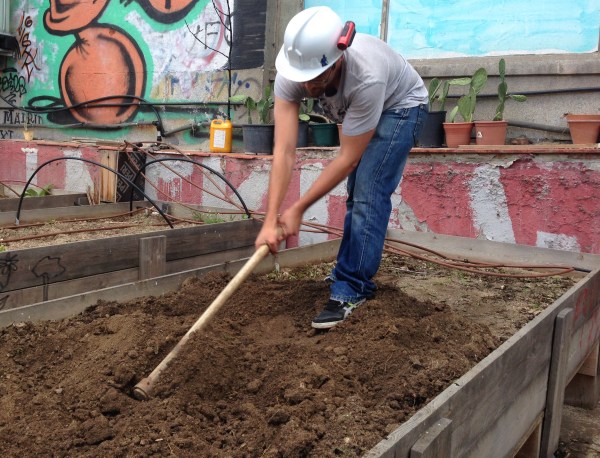
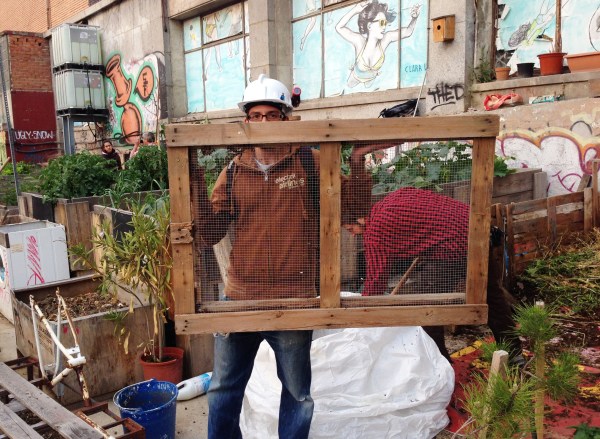
Obtaining the compost
The front face of the compost bins is not fixed like the others, but rather has hinges so that it can be opened like a door and the compost can be removed more easily. This is a very good idea! (I hope you are taking note for your garden).

Little by little and with the help of a shovel, they took the compost out of the composter on the left, which is the one that takes the longest (since November, according to what they told us), and sifted it with the help of a sieve so as not to add too many pieces to the substrate. large not yet fully decomposed.
cultivation tables
With the screened compost they were filling wheelbarrows, which were unloaded directly on the recently plowed cultivation tables.

Once the compost that ensures nutrition for the new plants was added, it had to be mixed a little with the substrate of the growing tables and equalized with the help of a rake in order to do the planting well. Elena, a sociologist who studies the benefits of urban gardens, took care of that, but she did not hesitate to collaborate in the tasks that afternoon.
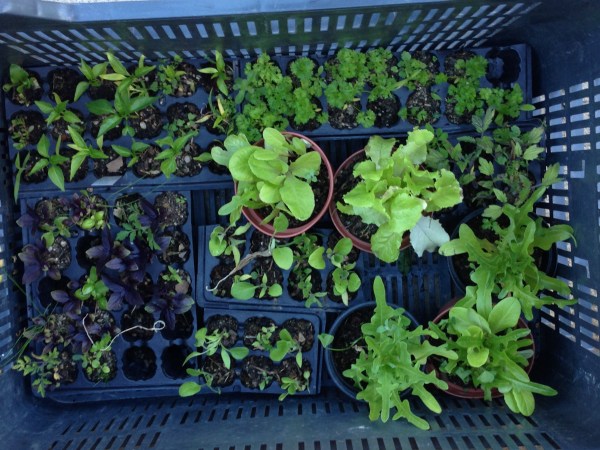
Look how good these seedbeds look with the new summer crops: tomatoes, peppers, aubergines, curly parsley, purple basil… a real pleasure for our senses!
Installation of the irrigation system and planting
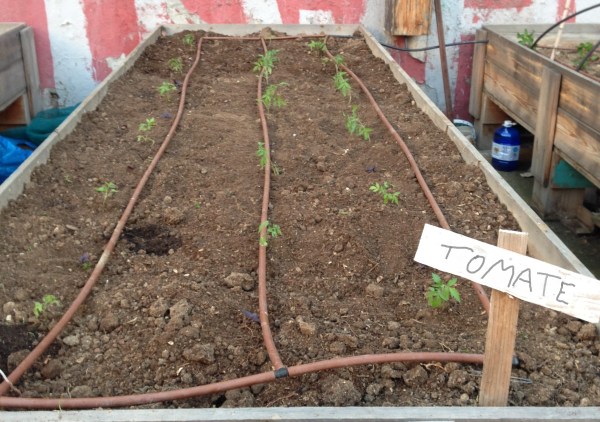
Once the substrate was conditioned, the drip irrigation tubes were placed in their place, and holes were made next to each of the holes through which the water comes out, so that each plant will have a dripper (photo 1).
With great care, the tomato seedlings were separated (photo 2), placing them in the holes (photo 3) and filling them and compacting the soil with the hand once each plant was placed.

Everything is ready! The tomato terrace prepared for the little plants to grow and give us tomatoes… yummy yummy!
New compost for the garden
The compost bin is empty, so it has to be filled again so that in a few months the new fertilizer will be ready.
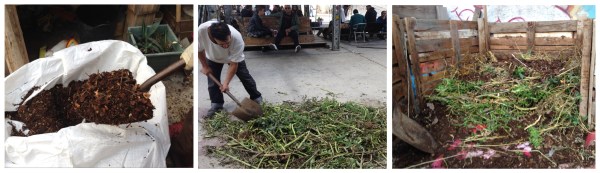
To do this, layers of “green material” and “brown material” were alternated in the compost bin. As green material, they added the remains of the previous crops previously chopped (branches, leaves, stems…). As brown material, the remains that had remained from sifting the already finished compost and also part of the «compost in process» from the composter next door. This is a good way to speed up the process, since we are incorporating half-decomposed particles and a lot of microorganisms, which are really the ones that carry out the process of transforming organic waste into compost.
On other occasions they had also been able to have horse manure, very suitable to add to the composters, but this time they have not been so lucky!
And with these tricks on composting we finish today’s post!!
I hope you find these tips useful to cultivate an urban garden in your home, school, community patio… or wherever you want!