What is Vermicompost: The work of worms in the compost
Here is the second part of the article Making vermicompost in Agronomists. After telling you how and where the compost that will serve as food for the worms is made, in this article we are going to see the main tasks that are carried out to obtain the final product: the worm compost or vermicompost.
Prepare the precompost
As we have already seen, the first thing is to prepare this product, which we call “precompost” (in this case, crop residues and rabbit and chicken droppings that are transformed into compost in the large cordons of the ETSIA composting plant). This is very important because it is necessary to incorporate organic materials into the worms’ habitat so that, in return, they produce vermicompost.
Once the precompost is ready, we can give it to the worms and, with proper care and handling, they will give rise to the fertilizer we expect.
How do worms compost?
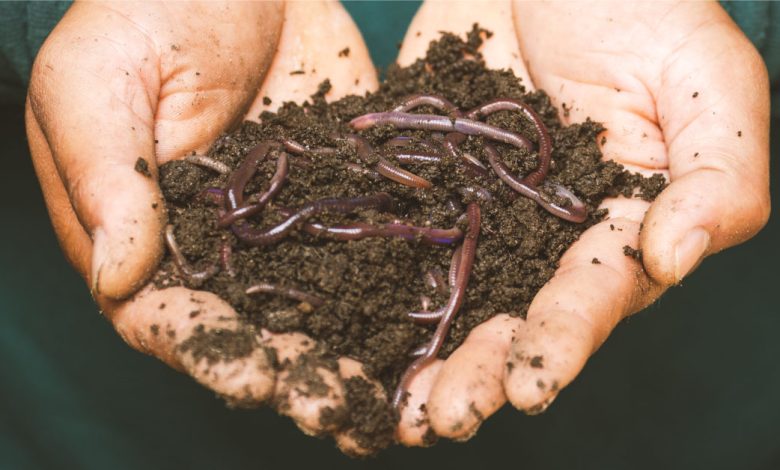
When the worms feed on the «food» that we provide them, processes of fractionation, synthesis and enzymatic and microbial enrichment take place in their intestine; that is, in Christian: as it passes through your intestine, the residue is «loaded» with beneficial compounds and microorganisms that further favor its decomposition.
Consequence? The waste product excreted by worms, worm humus, worm compost or vermicompost, is an organic product capable of stabilizing faster than normal compost. The product is more decomposed and, therefore, the transformation of the humus into mineral substances, which is what the plants really need and absorb, is faster.
The vermicompost ridges
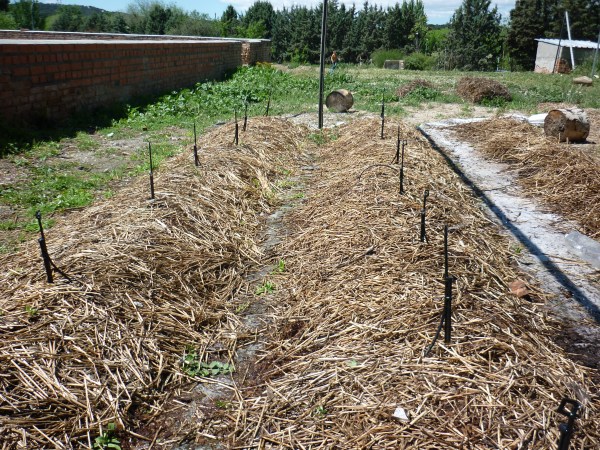
To form the ridges or cords of compost + worms + vermicompost that you see in the photo, the first thing was to spread a protective surface on the ground to isolate them from the ground and weeds. For this, anti-weed geotextile meshes were used (specifically the HORSOL BIO anti-weed mesh).
On top of the protective mesh, two ridges were made with the precompost and with the purchased worms that we talked about in the previous post.
For a few months, they waited for this population of worms to multiply so that they could make more ridges without having to buy more worms.
Meanwhile, they were already doing their job eating and digesting their «food» to give rise to vermicompost.
How to multiply the number of worms
The worms only need food and to be comfortable to reproduce nonstop and exponentially. In fact, it is not uncommon to dig a little in the ridges and find, in addition to worms, eggs like these that I photographed when I visited the ETSIA vermicomposting plant: oval, yellowish in color and a few millimeters.
In order to achieve a maximum rate of worm reproduction, the habitat we have created for them must be at a humidity of 80% more or less and at the optimal temperature: 20 to 25º (below that temperature they also reproduce, but at a slower rate).
If it is cold and they are outside, to maintain the right temperature we can try to insulate the ridges a little or where we have the vermicompost. In Agrónomos it is what they have done during the cold winter months, that is why you can see in the photo above a layer of straw that covers the cords (at the end of spring they remove it). Although the straw is a bit annoying, the worms will reproduce more if we use this simple method.
The humidity must also be adequate, which is why the ridges have irrigation sprinklers, which are responsible for keeping them moist.
It is also very important to renew their «food» since after a few weeks they will have digested most of what we put in them at the beginning. For this reason, according to what the people in charge of making vermicompost in Agrónomos told me, every 2-3 months they add new precompost to the ridges (about 20 cm high along the cordons), having previously removed the already made vermicompost (now I tell you What).
What to do with the worms and the finished vermicompost
When the population grows very large, the worms stop reproducing: they «detect» that there is little room and little food for all of them, and they begin to reproduce at a much slower rate.If we remove half of the worms they will have more room, eat more and reproduce at a high rate again.In addition, with the ones we remove, we can make another ridge and obtain twice as much worm compost.
For this reason, and because it is necessary to remove the finished vermicompost, it is why they use this technique of “trick the worms”:
We say that they «deceive» them because they put a kind of «bait» on them so that they go towards him and thus be able to capture them. The bait is a string of precompost “fresh from the oven” (that is, from the precomposting plant) that they put on top of the ridges. Fresh and appetizing food for them, and above all…free! since they just brought her in and she still doesn’t have any worms.
The worms will climb up into the new cord. When they have done so, it will be time to remove them together with the “trap” and also remove the already finished vermicompost that they leave underneath. The worms will be distributed between the ridge they were in and a new one, so that…in a while, we will do the same operation and obtain double the worm compost! (Take note, this is a very good way to multiply worms!)
I hope that these tricks that they told me have been useful to you to make vermicompost in the garden
![Photo of Erica Gracilis: [Characteristics, Cultivation, Care and Disadvantages]](https://www.complete-gardening.com/wp-content/uploads/2022/08/erica-gracilis-characteristics-cultivation-care-and-disadvantages-390x220.jpg)
![Photo of Antirrhinum: [Care, Planting, Reproduction and Pruning]](https://www.complete-gardening.com/wp-content/uploads/2022/08/antirrhinum-care-planting-reproduction-and-pruning-390x220.jpg)
![Photo of Cauliflower Pests and Diseases: [Detection, Causes and Solutions]](https://www.complete-gardening.com/wp-content/uploads/2022/08/cauliflower-pests-and-diseases-detection-causes-and-solutions-390x220.jpg)
![Photo of The Ivy: [Planting, Irrigation, Care and Substrate]](https://www.complete-gardening.com/wp-content/uploads/2022/08/the-ivy-planting-irrigation-care-and-substrate-390x220.jpg)