【 Grow Basil 】How to Plant Basil in pots
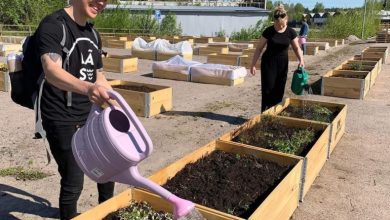
Today we are going to see how to grow basil at home step by step. Planting basil in pots is easy for anyone who wants to, as it is an easy crop, perfect for beginner gardeners or for growing the family garden with children.
In this post we will first see what are the characteristics and requirements of the basil plant and the benefits of growing basil in the garden or flowerpot, along with other plants. Later we will talk about how to plant basil in seedbeds, transplanting and how to take care of basil.
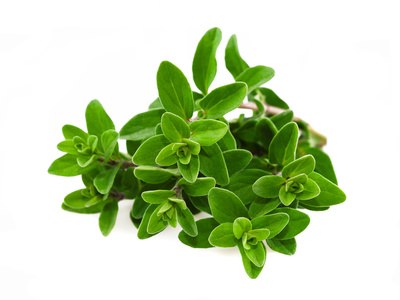
Basil characteristics How much sun and what soil does it need?
Basil (Ocimum basilicum) is an annual herbaceous plant, which means that it flowers once a year and then dies.
This aromatic plant is easy to grow, even in small pots or window boxes. In general, the care of basil is not too many, although you will have to take into account that it does not support low temperatures (it develops well between 18 and 35ºC) and it likes soil that is always moist (although not flooded).
It needs at least 3 or 4 hours of sun a day, although it also tolerates semi-shade, and you can even grow basil in pots indoors, as long as it is placed in a well-lit area and not too close to windows (so that don’t get sunburned due to the magnifying effect).
Like almost all plants, basil prefers a fertile and fairly aerated or drained soil (we will see how to achieve these two things a little further down, in the point that deals with transplanting to grow basil in pots).
What uses and benefits does basil have?
This plant is a tasty ingredient for many kitchen recipes (salads, sauces, marinades…), so it is a good idea to grow basil in pots and always have some fresh leaves of this delicious aromatic herb on hand for cooking.
In addition to being famous for its culinary use, its association with other plants can also be very interesting. There are several benefits of growing basil together with other plants in the garden: this aromatic enhances its flavor and, thanks to its strong smell, it repels many of the typical pests of vegetables and flowers, such as aphids or whiteflies.
But everything does not end there, fresh basil leaves, in infusions or in poultices have important health benefits and medicinal uses.
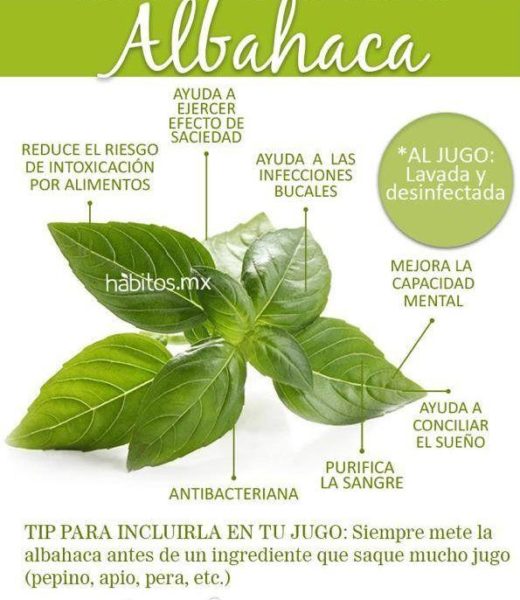
Here are some of the uses and benefits of basil:
- The flowering basil is used to make infusions against the vomiting and nausea of pregnancy.
- Due to its antibacterial properties, this infusion of basil flowers is also good for gargling to cure tonsils.
- It is a good diuretic since it helps exert a satiety effect, which is why it is used in diets to lose weight.
- It has a cleansing and purifying effect on the blood, which is why it is one of the star ingredients in detox smoothies.
- It helps improve digestion and reduces stomach upset.
- It has analgesic properties, hence its use to relieve headaches, accelerate the healing of colds, etc.
- Accelerates wound healing.
How to grow basil at home step by step
Below we will see the steps to grow basil in pots and take care of the basil plant from seedlings to harvest.
1. How to plant basil
The best way to ensure that the plant will succeed is to make a basil seedbed first and then, when the plants are a little grown, make a transplant to the definitive land (to the pot, planter or container of the flowerpot at home that we are going to use to plant basil).
When to sow basil at home?
This is a spring-summer crop, so the best time to sow basil in the garden is spring, so that we harvest it throughout the summer and, if the temperatures do not drop too much, also during part of the autumn.
In any case, if we are going to grow basil in pots indoors, we can start the cultivation in seedbeds at the end of autumn or during the winter so that, at the beginning of spring, we can already harvest the first basil leaves.
Make a basil seedling
Fill the small containers of the basil seedbed with soil with a mixture of universal substrate and natural fertilizer (such as earthworm humus or compost).
To make a basil seedling, you can use small recycled containers (such as yogurt cups or eggshells) or purchase seedlings or seedlings like this one:
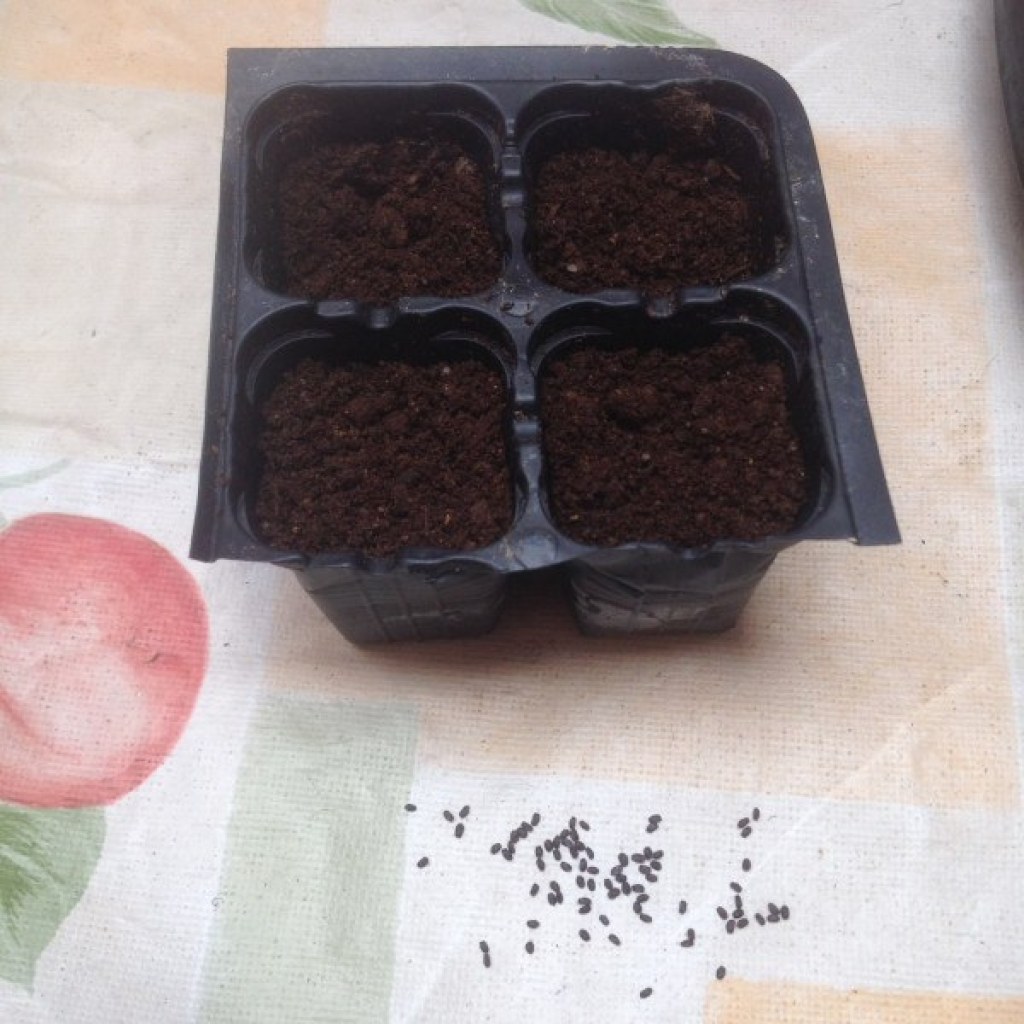
In each container or alveolus of the seedbed we will sow several basil seeds (since not all of them normally germinate). Make two or three small holes in the substrate with a pencil or your finger and place, 0.5 to 1 cm deep, a seed in each of them before filling the hole with a little substrate.
Then an irrigation is carried out to moisten the basil seeds. The best thing to do so that the seeds do not sink with the water from the first irrigations is that, until they germinate, we water every day with a sprayer that applies the water in fine drops instead of in a jet.
To grow basil at home you have to keep the seedlings at a suitable temperature and in a suitable place. If the minimum temperatures are below 15 ºC, it is better to have the seedlings inside the house instead of in the patio or on the balcony.

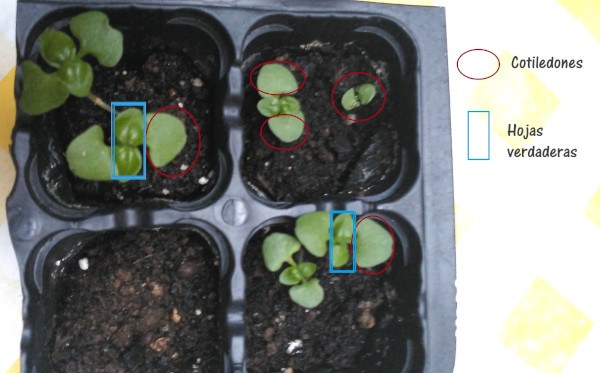
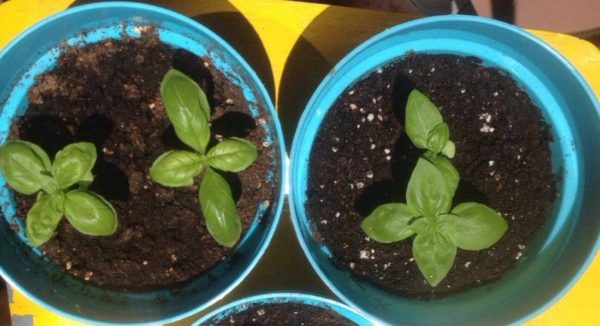
Two or three weeks after planting basil, the seeds will have germinated (as seen in the photo above), and two tiny leaves will appear: the cotyledons. After this you can water carefully with a watering can or a bottle without fear of damaging the seed. The seedbed can be moved to gradually increase the hours of sunlight, although a lot of direct sun is not very convenient when the plants are so small.
The cotyledons will grow and, after a few weeks, the true leaves will appear. The leaves will come out in pairs and one in front of the other, as seen in this photo:
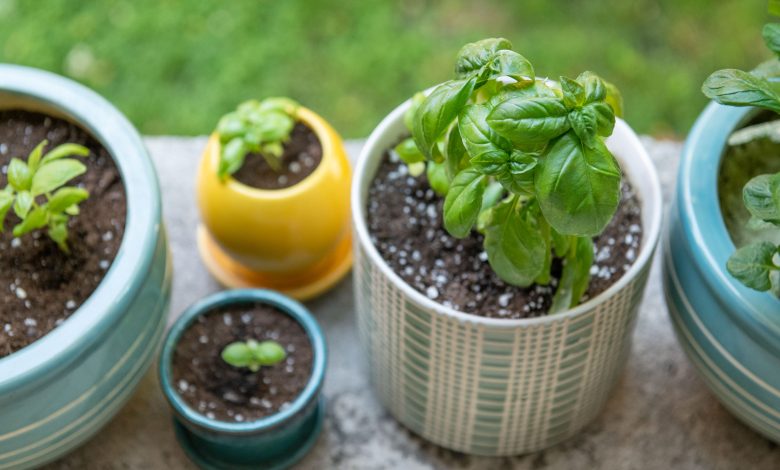
2. Prepare the containers for the basil transplant
A couple of months after planting basil in seedbeds, we can transplant the seedlings to their final containers or to the terraces of our garden.
If you are going to grow basil in pots, you should know that this aromatic plant does not have very deep roots, so pots or planters 15 cm deep and about 10 cm in diameter will suffice.
First, at the base of the pots, we place a thin layer of stones to improve drainage and aeration. In this case we buy clay gravel, since it weighs very little and it will be more comfortable to move the containers.
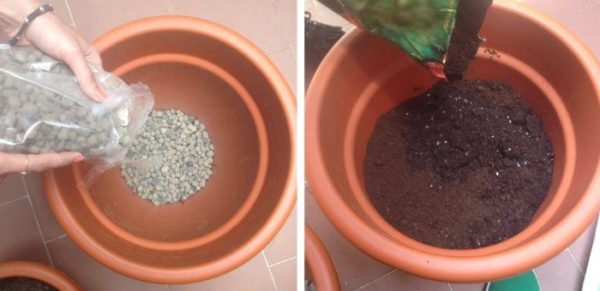
On top of the gravel we add universal substrate up to about two thirds of the container, and in the last third (the most superficial) a mixture of the universal substrate with the fertilizer for the garden. then we will add a few handfuls of normal substrate to cover the mixture so that the humus is covered
3. Basil transplant
Do not water the seedbeds the day before transplanting so that the soil is more compact and it costs less to remove the entire block from the small container and transplant the basil plants.
With the help of a shovel or a spoon, we take the plants out of the seedbeds, being very careful not to break the roots (if the task is complicated, we can split the seedbeds with a knife and open them in such a way that the plant is extracted with the lump of substrate and roots more easily).
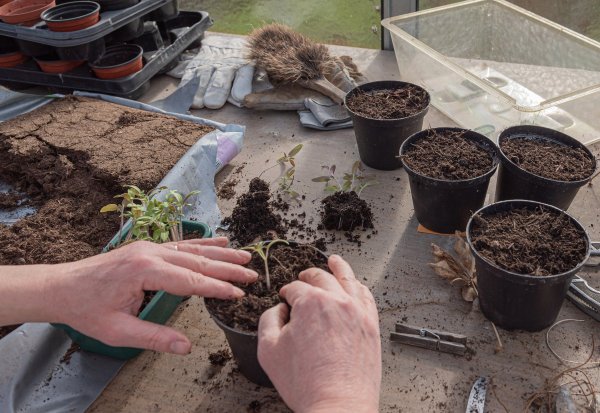
Then we have to make a hole in the pots where we are going to plant basil (of sufficient size to fit the root balls of the seedlings). We introduce a plant in each hole, cover with soil up to the height of the first cotyledons and compact the substrate a little with our hands (as seen in the photo above) so that the plant is well settled.
We place two basil plants in each pot with the idea of eliminating the worst of each pair a few weeks later, but in the event that you put several plants in larger containers (such as planters), the separation between them should be about 30 or 40 cm.
4. Basil irrigation and care
This plant needs abundant watering throughout its cultivation. It has a high risk of becoming dehydrated in the heat if it does not have enough water, so this is one of the most important aspects of basil care.
You have to keep the soil always moist but without it getting waterlogged. In the case of cultivation in pots, this problem is less frequent because the container has holes in the bottom and a drainage layer that facilitates the exit of excess water, but also for this reason it is important to water the basil every day to maintain the substrate. wet.
If it can be watered a couple of times a day in small amounts, much better, because this way we will prevent the soil from becoming very dry in the hottest hours. You can also install a home automatic irrigation system or vacation irrigation, and not worry about this aspect for several days.
How to care for a potted basil plant?
There are some cultivation tasks to take care of the basil plants that will make our harvest even more abundant.
During the time that the crop lasts, you should weed the soil from time to time to aerate and loosen it. With the help of tools to cultivate the garden, such as a small rake, a cultivator or a almocafre, remove the superficial layer of the soil to facilitate drainage, eliminate weeds that may have appeared and prevent the appearance of scabs.

It is also recommended to trim the stems. Trimming consists of cutting the tip of the upper stems to encourage more stems to sprout, the plant to become more leafy and the crop to last longer.
Basil is an annual plant, that is, it dries up and dies once it has flowered at the end of a cycle. To delay this moment and that the basil continues to produce longer, cut the flower buds from the end of the stems (they usually appear a month or a month and a half or two months after planting).
Another care for basil is to prevent and monitor the appearance of pests and diseases. Although we will not have too many problems when growing basil at home (especially if we have the pots indoors), it is important to know the most common basil pests so that, if they appear, we can recognize them and get rid of them as soon as possible.
5. Picking or harvesting basil
After sowing, transplanting and caring for basil for weeks, the question comes… When is basil grown? How long does it take to grow?
Approximately 6 weeks after planting (about 3 months after sowing), the basil harvest can begin to be harvested (we in the northern hemisphere usually harvest the first leaves in the month of July).
Cut the stems with scissors at the bottom as you need them. Go cutting the youngest stems that are more than 10-15 cm from the ground, always leaving the buds below where new stems or branches will come out.
How can fresh basil be preserved?
Basil is usually consumed fresh in salads or sauces such as pesto, but to get fresh basil in winter or early spring, we must pay a high price in supermarkets (fresh basil leaves are quite expensive and growing in winter does not cost much). it is usually easy due to the cold and the lack of light…).
If we want to save on the shopping basket and have fresh basil all year round, the solution is to freeze the leaves and thus preserve them for months. You can freeze the twigs with the whole leaves in plastic bags.
Another option is to chop the basil leaves and store them in the fridge in a glass container or in airtight bags with a generous splash of olive oil. The oil helps the chopped basil stay fresh for weeks.
Like most medicinal plants, basil leaves can also be dried. After harvest, hang the twigs upside down for a few days or place them separately on newspaper. Keep the dried leaves in a glass jar and you can use it along with the rest of the spices for months.
Reproduce a basil plant How to plant basil without seeds?
If you want to keep the basil seeds to plant another year, leave a group of flowers (when the end of the crop is approaching, at the end of summer) so that the seeds form and you can collect them.
Although we can plant basil from scratch as we have seen in the steps above, if we already have a plant, the easiest thing is to reproduce the basil by cuttings or stems instead of by seeds by putting part of the basil plant in water.
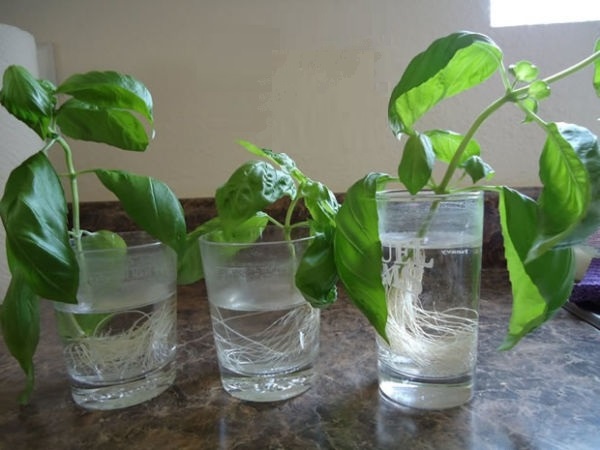
Cut some stems from the basil plant and put them in a container with water without letting the leaves get wet. You can add homemade natural rooting agent to the water to accelerate the growth of the roots in the basil twigs or cuttings.
After 7 or 10 days, when the roots are clearly visible, it is time to plant the basil in pots as we saw in step 3.
References
- Muñoz, F., 1996. Medicinal and aromatic plants: study, cultivation and processing. Mundi-Press Books.
- Barroso, L. & Jerez, E., 2000. Behavior of water relations in white basil (Ocimum basilicum L.) when irrigated with different volumes of water. Tropical Crops, vol. 21 (3), p. 57-59. National Institute of Agricultural Sciences. Havana Cuba.
- Sánchez Govín, E. et al., 2000. Pharmacognostic study of Ocimum basilicum l. (white basil). Cuban Journal of Pharmacy, vol. 34 (3), p. 187-195.
- Barasoain, R., 2005. Basil in the garden and in the kitchen. Magazine The Fertility of the Earth, nº 22, pag. 52-55
![Photo of Holly Pruning: [Reasons, Season, Tools and Steps to follow]](https://www.complete-gardening.com/wp-content/uploads/2022/08/holly-pruning-reasons-season-tools-and-steps-to-follow-390x220.jpg)