Grow Plants: How to Cultivate and Grow Any Plant in [13 Steps]
I t is a very common mistake to think that planting plants it only consists of digging a holeinto the ground and bring them into it. But nothing further from reality.
In reality, to plant plants correctly, a wide variety of factors must be taken into account, such as the quality of the soil, the climate, and it is even necessary to consider which plants are most suitable for each condition.
If we do it correctly, this will bring us great benefits, since we will not only be saving resources, but in some cases we will be benefited by the fruits of certain types of plants, or simply by the fantastic way our home will look.
In this article we teach youthe correct way to plant plantsand so you can renew your garden or orchard as soon as possible.
Let’s do it!
Before you start: These articles may interest you
- Antimosquito Plants: Types and How to Plant Them.
- Plants in Spain that are in Danger of Extinction.
- Carnivorous Plants: How to Plant Them.
- Hanging Plants: Complete Guide.
- Invasive Plants: What are they and how to combat them?
- Ornamental Plants: Types and Care.
- Indoor Plants: Complete Guide.
- Indoor Hanging Plants: 15 Examples and Care.
- Non-flowering indoor plants.
- Durable and resistant houseplants.
- Indoor plants that bloom all year.
- Feng Shui Plants: How to take care of them and Where to place them.
- Poisonous Plants: Characteristics, Types and Examples.
- How to care for aquatic plants.
- Tropical Plants: 21 Examples and Images.
- How to Plant Frankincense.
Sowing a plant: Basic considerations
Some of the conditions that we must take into account before starting to plant plants are:
The Season: When to grow a plant?
- Before planting, we must choose the right season to plant our plants.
- The planting dates vary according to the species of plant that we want to plant.
- Find out what the most suitable times are, considering the region where you live and the type of plants you want to plant.
Climate and light What do plants need?
 As in the season, you should consider the climatic conditions that prevail in your region.
- Depending on the climate and temperature where you live, some plants may grow more easily than others.
- Likewise, depending on the type of plant you want to plant, the sun exposure needs may be different.
- Some plants such as tomato, squash or cucumber require more sun exposure than others, while many grow very well in the shade.
Type of soil for the different plants
Your soil may be lacking in nutrients or not in the best condition to grow the type of plant you want.
Find out the ideal conditions to achieve the best development of your crop. It regulates temperature, soil acidity, drainage, and soil density.
In the same way, you will have to make the appropriate fertilizations to nourish the soil and make it easier for the plant to feed.
Consider the type of soil you need based on the species of plant you want to grow.
loam soils
 They are loose, fertile and retain moisture well due to the proportionate amount of clay they have.
More information, here.
clay soils
They are difficult to work with because they are made up of very fine particles and have rather poor drainage, which is why they take time to dry out and easily become waterlogged.
More information, here.
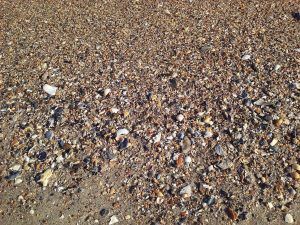
sandy soils
They are loose and dry quickly, but they retain moisture and nutrients poorly. However, this is easily resolved with mulch or humus.
More information, here.
Trick:Legumes, especially peas and broad beans, give off nitrogen, so their cultivation is a great natural fertilizer for the soil and very convenient for future crops.
the padding
If you want to take care of your soil for future plantations, you have to mulch, which, among other things, regulates the temperature, protects the roots from the cold, retains moisture, nourishes the substrate and prevents the growth of unwanted plants.
The padding is nothing more than a protective layer of between 5 and 15 cm. Made with organic materials, such as bark, straw, wood, volcanic soil, sand, etc.
In addition, it is necessarytill the soil so that it is loose, soft and broken up.
 By removing the earth, the superficial layers that retain moisture better and facilitate the circulation of oxygen in a more fluid way are loosened.
Finally, calculate the ph.pH determines the acidity or alkalinity of the soil.
This is important depending on the variety you plan to plant. There are species that require more acidic soils, while others require a lower level of acidity in order to develop properly.
Favorable associations in different plants
It is very important to consider which species you put together, depending on the benefits they can bestow on each other.
Similarly, it is essential that you are aware of those plant species that should not be planted together for any reason, either because they compete for nutrients or because they attract certain pests that are harmful to the rest of the crop.

Sowing a plant in a pot or garden: which is better?
The answer to this question will determine the process of planting a plant.
Obviously, planting a plant in a pot is not the same as doing it directly in the orchard or garden, outdoors and at the mercy of the weather.
| Advantage | Disadvantages | |
| Sow plants directly | Free development of the plant.
No transplant required. |
During its first days of life, the plant is exposed to inclement weather, be it frost, excess light, rain, etc. |
| Plant potted plants | Control over light, temperature, substrate and air conditions.
Selection of the strongest plants before transplanting. |
There is a greater risk of failure when transplanting the plants, because whenever the transplant is done, part of the root system is inevitably lost and, consequently, the developing leaves suffer from lack of water. |
the necessary nutrients
The substrate must be left in the necessary conditions for sowing. Spread some organic fertilizer such as mulch, manure, humus, etc.
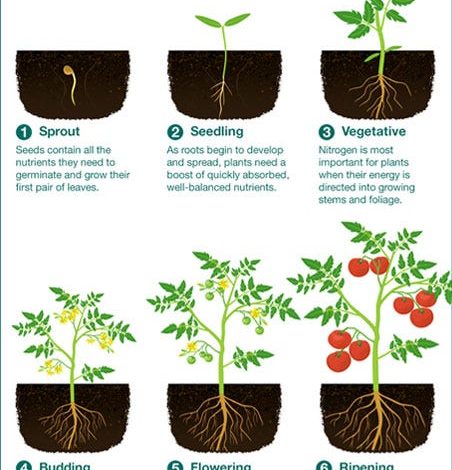
In gardening there are three essential nutrients:
- Nitrogen: necessary for the growth of leaves and stems.
- Match: which is required for the formation of roots, fruits and seeds.
- Potassium: for disease resistance and general plant health.
Find out the nutritional requirements of the variety you are about to plant.
These are normally presented as NPK values, which indicate the ideal ratio of each of those nutrients respectively.
Sometimes certain crops leave the substrate with essential nutrients for other plants.
In that aspect, crop rotation is essential. At other times, adding compost or worm castings is enough to nourish the soil.
Irrigation, humidity and risks
In some species, atmospheric humidity influences during development, specifically during the flowering or fruit ripening stage.
Likewise, there are species that are more tolerant to drought than others.
Humidity is a very important factor that you should consider.
Make sure of the optimal humidity levels required during each of the development stages of the type of plant you want to grow.
It is very important to clarify that an excess of humidity can cause diseases, pests and root death, as well as the loss of nutrients in the substrate and rot.
It is best to make sure you have well-drained soil to avoid waterlogging.
How to Grow Plants from Seed [15 Steps]
- Make sure of the conditions that your seed requires to grow: climate, dates, temperature, humidity, light, etc.
- Clear the ground.Extracts weeds and all kinds of residues. All plants must be pulled out by the roots to prevent them from growing back and competing for nutrients with your flowers.
- Moisten the soil before planting plants.This reduces the risk of expelling the seeds by the force of the water.
- Fertilize the soil.If you use natural fertilizers, mix them into the soil to a depth of 5 centimeters.
- Mark with signs or any type of indicator the specific place where you are going to plant each variety of plant, in case you are going to do a varied crop.Remember to research the favorable associations of each crop.
- Prepare the land, according to one of the three most used techniques: Scattered or broadcast sowing: the seeds are spread throughout the land on a regular basis.Sowing by rows: Furrows are formed in a straight line at an equidistant distance between each one of them. The seeds are deposited in each furrow.Sowing by trickle: Holes are dug in a straight line, equidistant from each other (or in a zigzag pattern) and the seeds are deposited in each one.
- Press the seeds into the soil according to the specifications regarding recommended depth and distance.Cover them lightly. If the seeds are very small, you can mix them with sand to make it more comfortable to distribute them on the ground.
- Once you have deposited them in the ground, cover them with a little mulch.
- Water the land or fertilize the soil, depending on the variety you have planted.Water very carefully, spraying, so as not to drag seeds or puddle.In certain cases, it will be recommended that you adopt a drip irrigation system.
- Wait for the seeds to germinate.Then, transplant your sprouts if you have planted them in seedbeds. Once they have been born, it is necessary to thin them, that is, remove excess plants so that there is a reasonable space between them. The average distance varies by species.
- Protect your plants.Use mesh to protect your crop from pests and possible predators. Protection is important mainly during the early stages.
- Establish tutorials for those varieties that require them.
- Check your plants regularly to make sure they have n’t contracted any diseases or been attacked by pests.
- Water your plants, according to the needs of each crop.
- If you consider it necessary, prune them.Sometimes, if we want to give greater vigor to the flowering and fruiting process of some plants, we must remove some secondary stems, as well as remove the oldest or weakest leaves or clean the fruits.
How to Plant Plants by Transplant [12 Steps]
- Before transplanting your plants, to achieve a good transition, see them acclimatize little by little.Just place the pot or seedbed in a sunny area for two hours.Over a couple of weeks, add an hour each day.
- Choose the definitive area where you will transplant your seedling, according to the necessary requirements of each particular variety.
- Clear the ground with a rake before planting.Plow the land to improve the conditions of the substrate. Do a thorough cleaning of weeds and, if applicable, the remains of previous crops.
- Moisten and fertilize the soil a few days before transplanting, if necessary.
- Dig a hole big enough and deep enough for the roots of your plant to develop.The size can vary depending on the root system of the variety, but it should be at least twice the size of the root ball. For example, if your plant’s root ball is 2 inches in diameter and 3 inches long, you ‘ll need to dig a hole at least 4 inches wide and 6 to 8 inches deep.
- You can place a drainage layer at the bottom of the hole to facilitate the root development of your plant and the drainage of the substrate. You can also place a layer of organic fertilizer and mix well with the soil.
- Transplant your plant into the freshly dug hole, taking care that the root ball does not split open or crumble.Check that no roots are left outside the hole. Preferably, transplant on a cool, windless day. In most cases you will find that it is best to transplant in the spring.
- Begin to fill in the hole, make sure that the trunk of your plant is straight. If you consider it necessary, you can place a stake to protect it and help it grow vertically. Remember that these should be placed in the hole before the root ball is inserted. Otherwise, you run the risk of damaging the roots.
- Tamp down the soil to compact it and eliminate air pockets.You can use compost or mulch, depending on the variety and the conditions of the substrate.
- Water according to the moisture and irrigation requirements of the plant.
- Finally, you can protect your crops by placing mesh fences around them.Check your crops regularly to ensure that their development is satisfactory.
- Check that they are safe from pests and diseases.
Plant pests and diseases
aphids
To prevent aphids, the application of nettle slurry is recommended.
To combat them, potassium or biodegradable soap can be applied to the underside of the plants. It should be applied very early in the morning or in the afternoon, when the sun no longer hits the leaves.
The soap will help clean the honeydew excreted by the aphid and soften its cuticle.
If the plague persists or is very abundant, after cleaning the leaves with soap, we will apply neem extract, which will act as an insecticide.
thrips
Biological control can be done through its natural enemies.
Thrips have several natural predators such as certain varieties of mites, notably the Amblyseius barkeri and the Orius bug.
Another form of prevention is to place meshes around the crops and clean up weeds and debris.
To combat them, in addition, ecological alternatives can be used, such as potassium soap and, in extreme cases, natural insecticides such as neem extract.
nematodes
Nematodes are small plant parasites found in the soil.
Their shape is like an earthworm and they can reach up to 2 mm depending on the species. These small parasites feed on the roots.
To control them, we can plant garlic cloves as a repellent. It is also important to have a crop rotation and fertilize our soil.
They can also be treated with steam sterilization and solarization.
leaf miners
Leafminers are essentially insect larvae that live inside the tissue of leaves.
They tend to dig small galleries or paths between the leaves and stems, which reduces the space for the plant to photosynthesize.
One form of prevention is to place meshes around the crops and clean them of weeds and any type of waste or remains of previous crops.
Similarly, leafminer infestation can be prevented by planting trap crops near the plants to be protected.
You can plant pigweed, columbine or abutilon to attract the attention of miners and reduce their incidence in your crops.
White fly
The whitefly feeds on sap, reducing the productivity of the plant.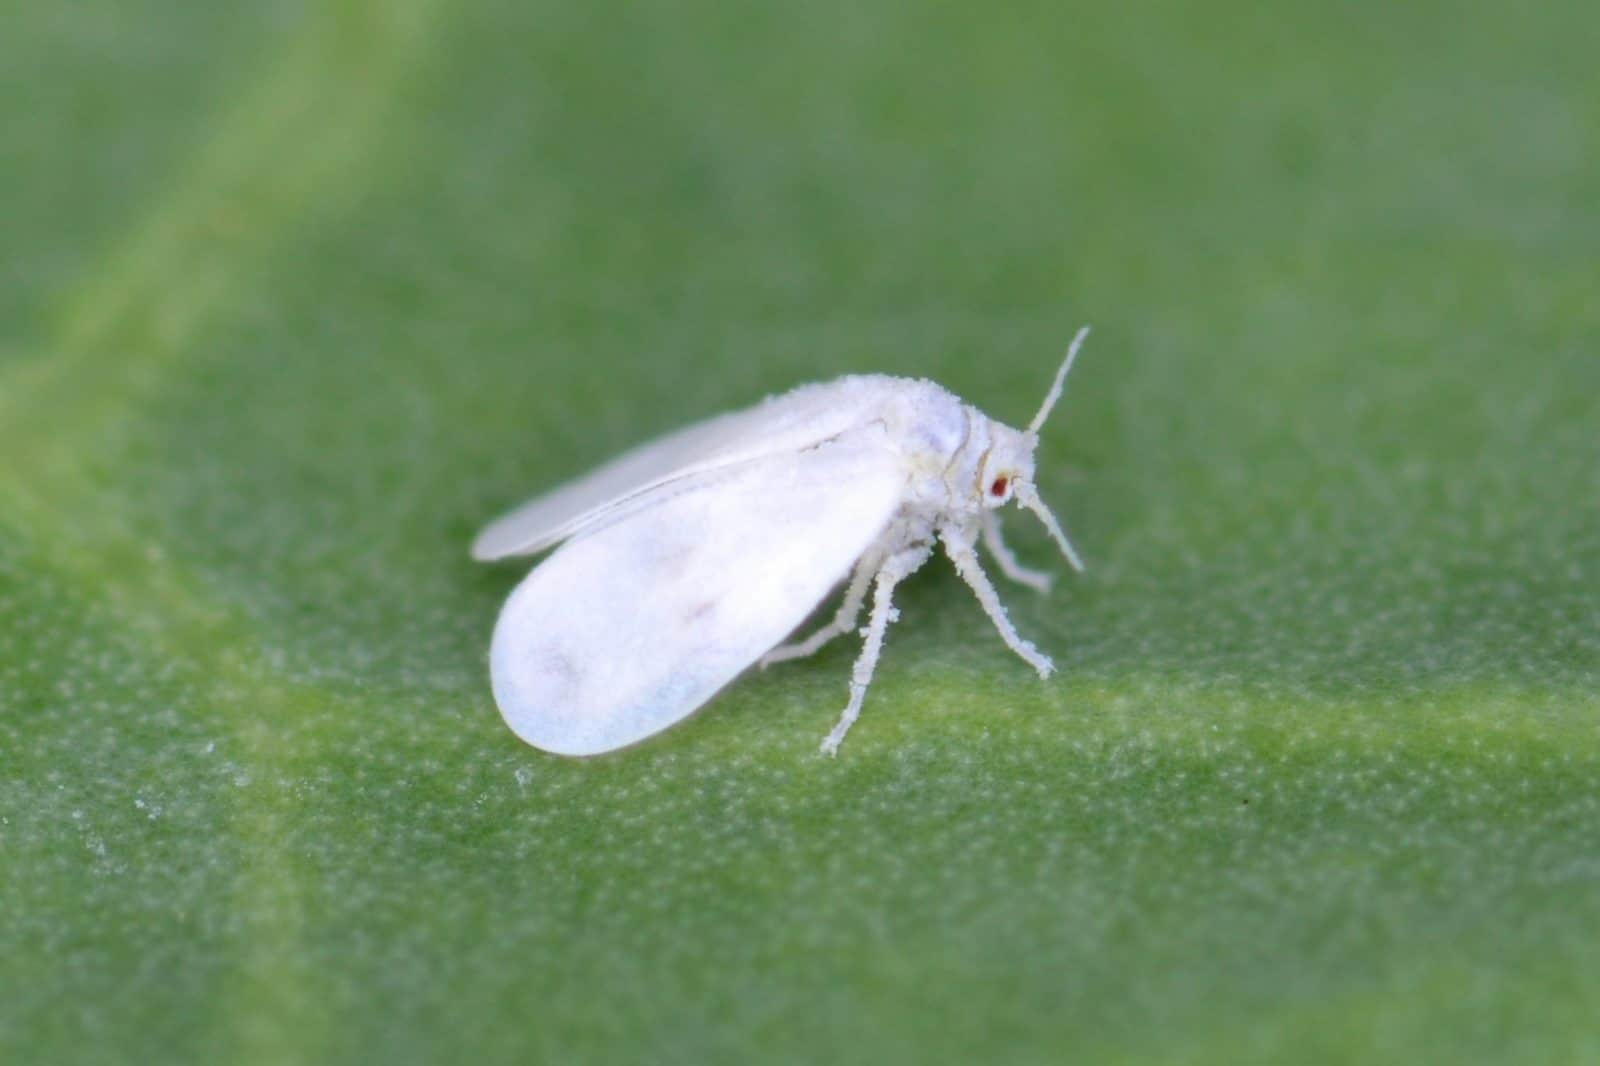
The damage they cause mainly in crops are deformities in fruits, leaves and stems, weakening of the plant, desiccation of the leaves and it also favors attacks by fungi and viruses.
Whiteflies are often attracted to yellow and light green, so traps or containers of these colors with sticky surfaces can be placed for them to adhere to.
To combat them, in addition, ecological alternatives can be used, such as applying 1% potassium soap sprayed with rain or distilled water to the underside of the leaves.
Red spider
The spider mite is afairly tiny, four-legged mite that feeds on plant sap.
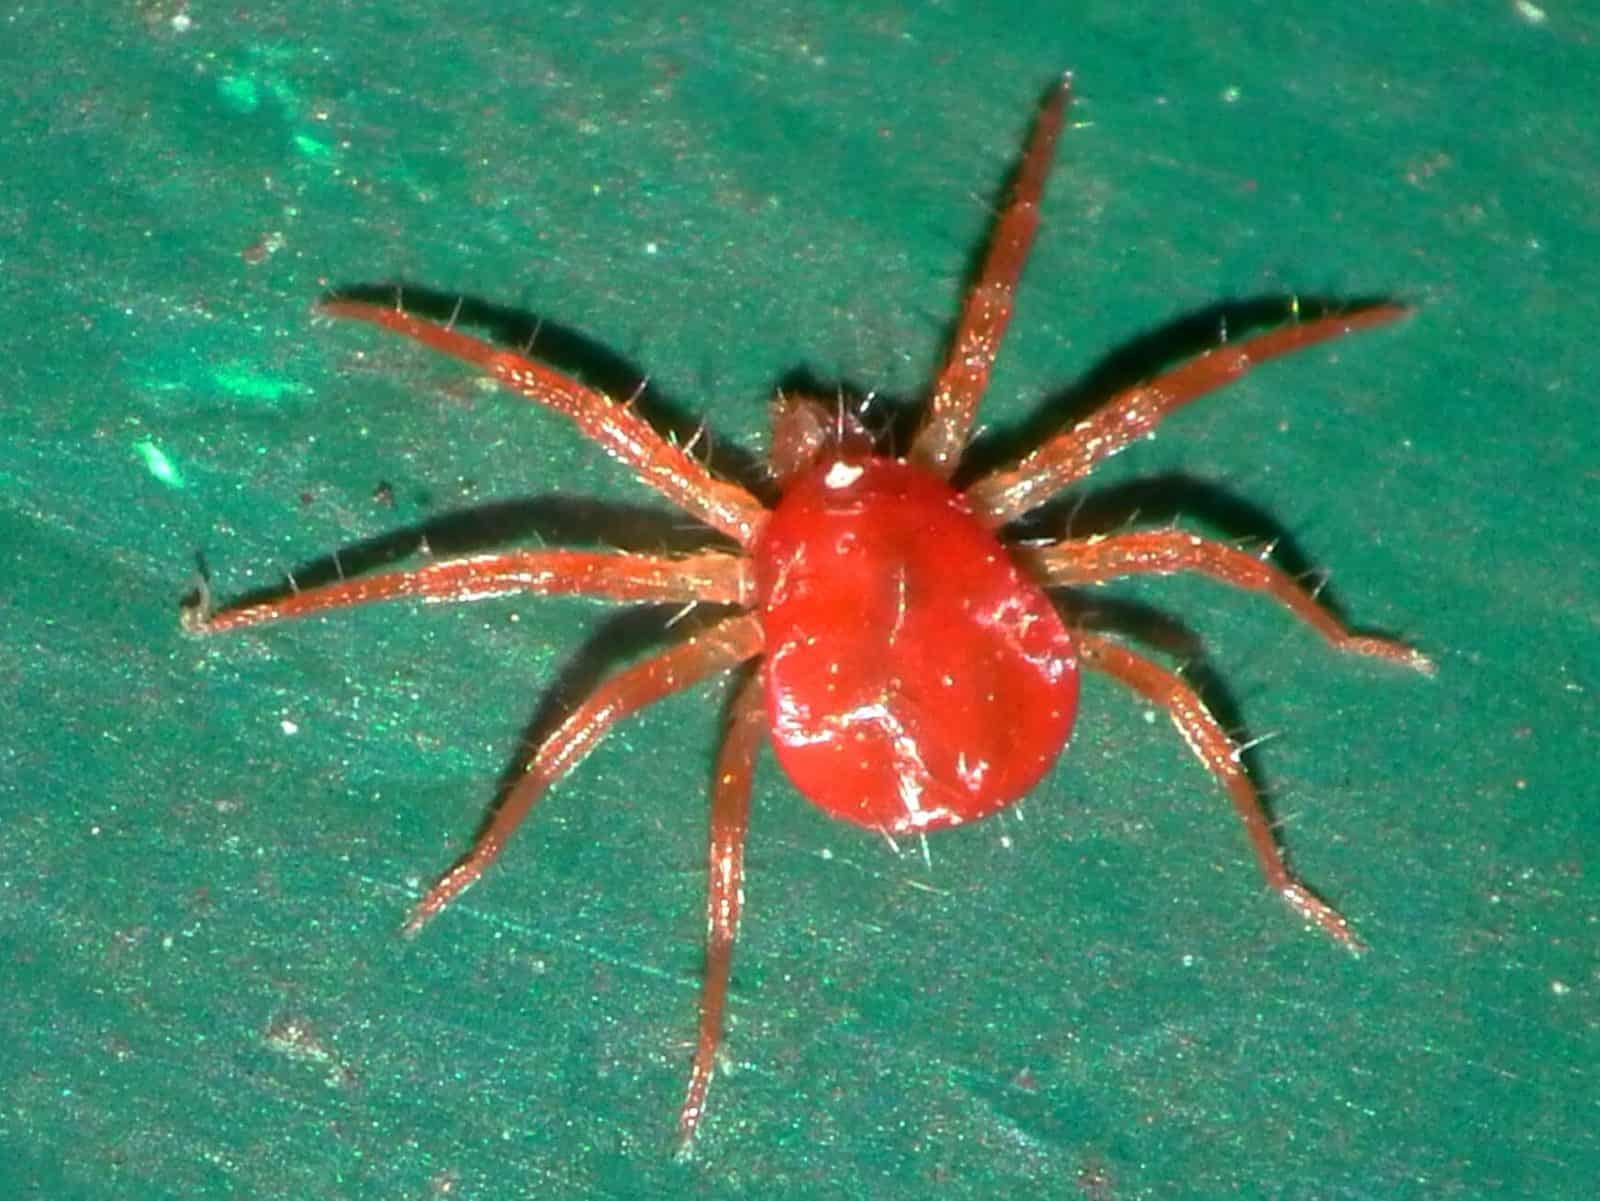 It is one of the pests that best adapt to different types of crops.
They feed on the superficial layer of the leaves, causing light spots on the upper and lower sides of the leaf, which increase in size until the leaf turns definitively and completely yellow.
These damages are irreversible and cause the death of the leaves.
To prevent its appearance, it is recommended to keep the crops clean of weeds and remains of previous crops. Another effective form of prevention is crop rotation.
It is also recommended to avoid substrates with excess nitrogen and to monitor crops during the early stages of development.
In fairly dry climates it is recommended to water crops at night to maintain moisture.
To combat an infestation, an extract of garlic and chili can be applied, although if the plant is very affected, it is best to eliminate it to prevent it from spreading to other plants.
rusts
They cause yellow spots on the leaves and stems. Its control is done with benodanil and oxycarboxin.
A good fertilization is also recommended to invigorate the substrate and the growth of the plant.
root rot
Root rot occurs under conditions of excessive soil moisture. The roots are weakened, so that the infected flowers and fruits are stunted.
A correct treatment of the soil must be done before planting.
stem rot
Stem rot develops in conditions of excess moisture and high temperature.
In addition to a correct treatment of the soil before planting, the temperature of the substrate and its correct drainage must be adjusted.
powdery mildew
Powdery mildew is a fungus that produces whitish spots on the upper part of the leaves that end up covering them completely.
It also affects stems and fruits. The affected leaves and stems turn yellowish and dry.
Usually, the wind is responsible for transporting the spores and spreading the disease.
![Photo of Hanging Plants: [Planting, Care, Examples, Irrigation and Images]](https://www.complete-gardening.com/wp-content/uploads/2022/08/2_Lobelia-300x225-1-300x220.jpg)
![Photo of Ambulia: [Care, Characteristics, Cultivation, Substrate and Pests]](https://www.complete-gardening.com/wp-content/uploads/2021/06/características-de-la-ambulia-390x220.jpg)