How to perform a transplant step by step: Complete guide with photos
Very good to all Agrohuerters. Today I am here to comment a bit on how to carry out a good transplant, either to have your plants at home, on the terrace or something temporary, a transitional pot, let’s say, with another final destination.
As you know, a month ago I explained to you how to make some very simple seedbeds with the idea that all of you would be encouraged to have your own. Well, there comes a point where the containers for a seed to grow or seedbeds do not have the useful surface and the volume of soil necessary for our crop to develop optimally and it is time to transplant it to another pot or larger pot.
1. How to choose the right planter
The first thing you have to have in mind is where your plants are going to go to choose the right pot:
medium pots
If your nursery is aimed at creating a small garden in pots to take care of it at home or on the terrace, it is best to buy medium pots (about 30 cm in diameter) where there is enough space for two plants to grow per pot, the The depth of these pots is usually about 20 cm, if they are deeper, the better because more substrate will enter the plant and the roots will develop better.
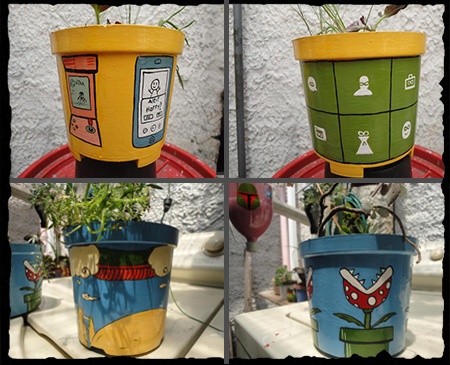
The material depends on your tastes, the wood is very pretty but if you are a bit of an artist and you like to paint you can always decorate your pots like our friend @MafeRaptor who showed us her urban garden in Bogotá.
planters
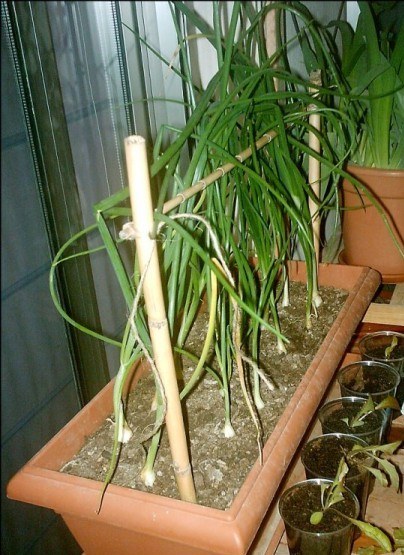
If you have root species such as carrots, garlic or onions in the nursery, I recommend an elongated pot, a planter, one that is longer than it is wide and with a good depth, so you can put several plants per pot in a row. Make sure that the soil in these pots is very loose as this will allow the root or bulb to develop without hindrance.
cultivation table
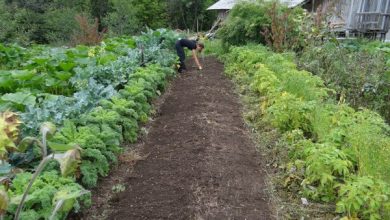
And if you have planted lettuce, cabbage, etc… The most advisable thing is to transplant them to a cultivation table since it is the structure that offers more surface for them to develop correctly, place them in a suitable frame (a separation of about 15 cm per plant will be more than enough) and the end result when they grow up will be truly spectacular.

In the event that it is a transition pot, as is my case, the transplant becomes even easier since you can place several plants in the same pot. For example, I needed some larger pots because the seedbeds were too small for me, but how am I going to transplant the plants to the garden? until its final transplant, with that volume of soil several seedlings can easily develop without the need to separate them even until their final destination.
All this is indicative, you can always buy a larger pot or another type of pot according to your tastes, but I suppose that if you are starting you will not want to make a high initial investment or occupy a very large space in your house with a disproportionate pot, that’s why I thought it appropriate to recommend medium pots for crops that grow tall and elongated and deep for root crops.
2. How to perform the transplant
Carrying out a transplant is very simple, but you have to take into account a couple of preliminary considerations so that it comes out as well as possible:

Appearance of a good root ball.
- That the plant is well developed. Make sure according to the phenological cycle of the plant that it is the right time to transplant it.
- Do not water the days before the transplant. Continuous watering softens the substrate, so when you take the plant out of its pot, it will most likely fall apart in your hand. If you don’t water a couple of days before, this excess humidity is corrected and the root ball will come out of the compact pot, making transplanting much easier.
- The new Substrate. The new substrate in which you are going to put your plant is, if not the same, similar to the previous one to avoid problems, in no case put a worse substrate since although germination is more delicate, it is now when the plant needs a greater supply of nutrients to develop flowers and fruits effectively.
- A piece of advice: Last but not least, if the plants have grown too close together in the seedbed, remember that it is recommended to put a couple of seeds in the same hole in case one does not germinate, you have to separate them by pulling very gently on the the base of each plant (the bottom part closest to the beginning of the substrate) so you will be able to separate it effectively without damaging its corresponding roots too much.
Once we have these considerations, doing a transplant is very easy.
You just have to place the substrate in your new pot, make a medium deep hole with a spoon or your fingers, insert the root ball and then cover it with another bit of substrate.
Done, you already have your transplanted plants and in a short time they will begin to grow big.
I hope these tips have been useful to you, they come out mainly from what I have seen these months, if you want to add any more you can leave a comment that will help us a lot,
All the best !
![Photo of Aglaonema: [Care, Planting, Irrigation, Substrate and Characteristics]](https://www.complete-gardening.com/wp-content/uploads/2022/08/aglaonema-care-planting-irrigation-substrate-and-characteristics-390x220.jpg)

![Photo of Rose Cuttings: [Concept, Season, Rooting and Planting]](https://www.complete-gardening.com/wp-content/uploads/2022/08/rose-cuttings-concept-season-rooting-and-planting-390x220.jpg)