Homemade seedbeds for beginners: Make seedbeds step by step
Very good to all Agrohuerters! Today I come to encourage you to sow a seedbed at home. We are going to start with something small, homemade seedbeds for beginners, easy to make and with very common materials. Nothing outlandish, we do not pretend to be the kings of the urban garden, we are simply going to plant some new plants that in the long run will bring us more benefits than an ornamental plant.

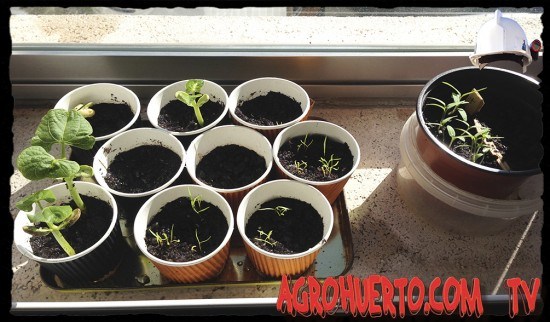
seedbeds for beginners
Everyone would like to have their garden on the terrace or simply in a few pots inside the house… But I think that for many people, the idea of starting a garden can be scary… «It’s a lot of work…, I don’t have space…, it’s not going to work out…, the dog is going to eat them…». They are all excuses that keep you from having your own food without even trying.
How to make homemade seedlings
As I have told you before, we are going to start with something small, we are only going to plant some species that we can manage properly inside the home.
If the plants turn out great, we will see in other articles the necessary care to control their growth properly and that our house does not become a tropical jungle. If they don’t come out, then nothing happens… We can try again with another species or repeat the homemade seedbed (there are handfuls of seeds…).
What plants should be planted in the nurseries
Whether the “final” destination of your seedbed is growing in pots inside the house or on a larger surface, on a terrace, there are some species that we should completely rule out out of simple common sense. Melons, watermelons, pumpkins, courgettes etc. Plants whose bush expands a lot and needs a space that you do not have, the same thing happens with plants that grow a lot in height…
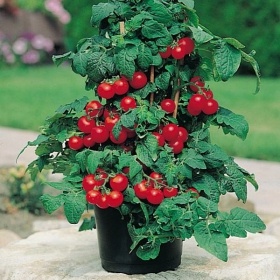
I recommend that, and I repeat, start with something simple, some cherry tomatoes, some padrón peppers, some carrots, onions, lettuce, low bush beans… Things that germinate easily and that with the right pruning do not get out of hand.
Containers for homemade seedlings
Here there is no star container and only your imagination rules. Whatever you have at home is worth whether it’s tupperware, flowerpots or plastic cups, paper cups, egg cartons, etc… Don’t complicate your life in the least. The types of pots that exist and how to choose the most suitable for the subsequent transplant is another story that does not interest us right now.
The only essential thing is that the container has a hole(s) in the lower part to facilitate drainage and that the water does not stagnate. It is also recommended that they have a height of 5 to 10 cm depending on how long you want to keep them once they germinate before the final transplant.
The substrate or soil
Once we have our chosen container, it is important to choose a good substrate or soil.
I am not going to give you any magic formula that mixes X amount of peat + Y of coconut fiber so that everything comes out great, I simply advise you to buy good, decent soil, go to a nursery or a store specialized in plants to advise you and get one good quality/quantity/price ratio, with a 10 L bag it is enough to make the seedbed and the subsequent transplant to a larger container. But I emphasize that nothing to buy land at all at 100, they tend to burn the seeds obtaining very unfavorable results.
Normally the earth in a bag is very flattened as there are many more bags on it, it is advisable to pour the earth beforehand into a container with a good surface to crumble it with your hands, don’t go crazy a little, with this the earth will gain in porosity by not being so compacted and in your container it will occupy a greater volume, with which you win by using less soil in the same space.
How to plant homemade seedlings
We are going to sow our seeds in 4 easy steps:
- The first step is easy, pour soil into our container. His thing is that you fill it about 3/4 of its capacity and then press a little to compact and level the earth, but the minimum ehh.
- Depending on the surface of our container, we make some holes, 1 – 1.5 cm, to sow our seeds, distribute them evenly depending on the geometry.
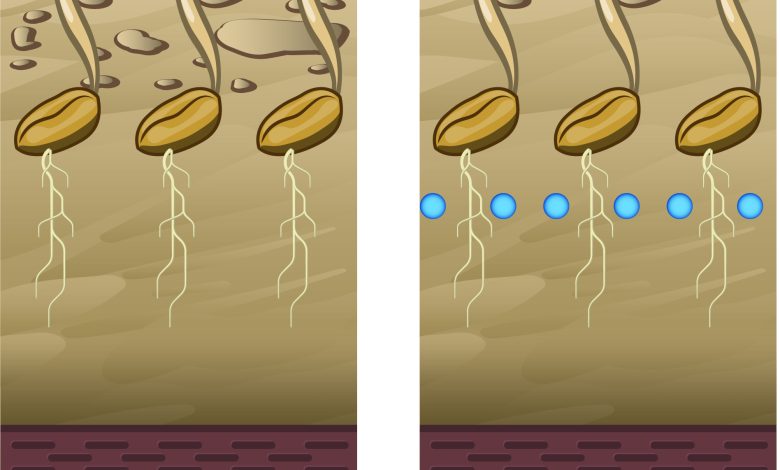
- We put the seed in those holes. How many?: Two per hole, just in case one of them doesn’t germinate… How deep?: Experts say that seeds should be buried twice as deep as the seed itself. With this I want to tell you that if they are small, a 1 cm hole is enough, but if you plant beans, for example, make the hole a little deeper. You don’t need to measure with the ruler.
- We cover the holes, moving the soil a little, and add soil until we fill the seedbed almost to the top, we press a little more and level.
Irrigation of home seedbeds
As you may have seen in the video that I have left you above, the seeds in our container can be very small and aggressive watering could sink them downwards, preventing their germination. That is why it is important to water in the form of fine rain, soaking the substrate but without the water falling with great force.
Sprayers are good for that, but if you have a good pulse or you can help yourself with a plug so that the water that comes out is as little as possible, the better, that’s what you save.
Maintenance and care in nurseries
You already have your seedbeds, now you have to place them near the sun, a window sill is the most ideal place if the winds are not very strong… There are many options, surely you will find the appropriate place in your home. It is advisable to water them in the same way that I mentioned before practically daily. Surely in a short time you will already obtain the first results.
In summary, we have seen how to make homemade seedbeds in a simple way, nothing fancy. The idea is to be able to get enough tomatoes from our own house to make your salads. When the plants grow and it’s time to transplant them, you can give them to a friend if you don’t want so many or donate them to an urban garden in your area, they will surely receive it with open arms.
Cheer up
![Photo of The Acacia Tree: [Characteristics, Planting, Care, Irrigation and Substrate]](https://www.complete-gardening.com/wp-content/uploads/2022/08/the-acacia-tree-characteristics-planting-care-irrigation-and-substrate-390x220.jpg)
![Photo of Jade Care: [Earth, Humidity, Pruning and Problems]](https://www.complete-gardening.com/wp-content/uploads/2022/08/jade-care-earth-humidity-pruning-and-problems-390x220.jpg)