Transplant Peppermint: [Conditions, Time, Tools and Steps to follow]
What should we take into account before transplanting peppermint?
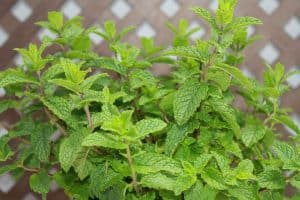 Peppermint or Mentha spicata is an aromatic creeping plant of the Mentha genus.It is believed that its ancient origin is located on the European continent, in England and later in Spain and Italy.
However, it managed to spread throughout the world thanks to its multiple medicinal and gastronomic benefits.
There are more than 25 recognized varieties of this genus worldwide and it can grow up to 80 cm in height. It is so versatile that it is the main protagonist of a famous Cuban drink called «mojito» and is also used in infusions that are very beneficial for digestion.
Main features
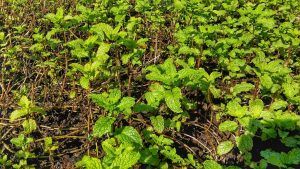
 As a good creeper, it exhibits a great expansive capacity, because it quickly floods the orchard or garden where it lives, thanks to its straight, hairy and elongated purple stems.
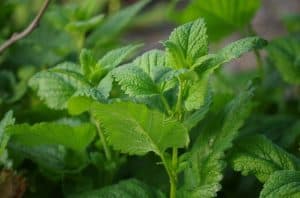
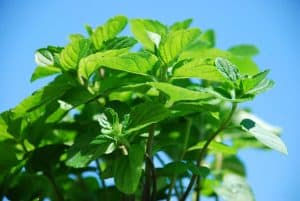
It also boasts striking oval leaves of an intense green. And it produces pale pink or purple tubular flowers, very well grouped in terminal panicles and its intense aroma is sensational .
It is very easy to multiply or reproduce it, because its stems or shoots are also creeping and quickly develop roots, very shortly after touching the ground. So it is really very simple to achieve its reproduction and enjoy its many benefits.
What is the best time to transplant peppermint?
 This plant can reproduce in various ways: by cuttings, division of its roots, by stolons or segments.
Experts believe that the ideal time to plant cuttings in previously conditioned soil should be early spring.
How to reproduce peppermint by cuttings?
The technique of reproduction by cutting is very simple and effective. Let’s see:
- The procedure begins with the selection of several branches of an adult plant (about 4 or 5) which will be pruned using garden shears to remove about 8 leaves from top to bottom and take the stem, supported by a cut diagonally near the nearest internode to the plant.
- Each cutting must have some leaves in the cup, you do not have to remove them all and it is enough that it has a height of about 15 to 20 centimeters long.
- Each cutting can then be submerged in water to sprout roots, or planted directly in the ground. It also turns out in a pot, above all to protect it from adverse environmental conditions associated with the winter period.
- If a pot is used for transplanting, it must have an excellent drainage system in order to prevent water from stagnating. The same happens if a pot-type container is selected, which should be wide to allow the plant to expand.
- The pot must be prepared with a fertilizer or substrate of organic origin that gives a lot of richness to the land. A layer at the bottom of worm castings will be excellent to encourage the growth of the seedlings. Once the soil and humus have been spread evenly with your hand, you can proceed to plant several cuttings distributed from the outside in, without leaving them piled up. They must be carefully buried in the ground about 4 centimeters deep.
- Then proceed to locate the pot in a place where solar radiation is direct. An indirect sun exposure, in partial shade, is recommended.
- If peppermint has been transplanted into garden soil, then it can’t get direct sunlight either. Place the pot or pot in a shaded space.
- Finally, watering must be constant, the soil must always be moistened, because the cutting does not have a root and that means that it cannot assimilate nutrients. To prevent its roots from becoming stunned, permanent sprays are essential, they will be more than effective in keeping the plant and the soil moist. If everything goes well, in a week new shoots will begin to emerge, with green leaves and that means that the first roots have also appeared.
- Two weeks later, they can be moved to a pot where they will remain near a window or another place in the house, in semi-shade, without direct sunlight.
What tools should we use to transplant peppermint?
- An inn to work.
- Garden scissors to cut the cuttings.
- An empty 5 liter plastic container, cut in half to use as a pot.
- A nail to pierce the container and regulate the amount of water.
- Adult plant cuttings.
- Earthworm humus.
- Land of oak or nursery.
- Stream water, free of metals and chlorine.
- A large punch bowl to mix earth and worm castings.
- A plastic container with a sprayer to do the daily irrigation.
- A pot for the final transplant.
How do we prepare the land to transplant mint?
The soil must be rich in nutrients and maintained at a constant moisture level that does not seriously affect it even if the amount of water used in irrigation is exceeded.
 This means that during this period of transplantation it must always be irrigated with the support of river or stream water sprays.
It is so versatile that it can also be planted in pots with good fertilizer, as well as in clay containers placed on balconies, terraces and other places indoors and outdoors of homes.
Even in hanging pots it can live. As has already been explained, it is very convenient to use earthworm humus at the bottom of the pot or pot and on top of it the nursery or oak soil, in a proportion of 50% each. She can easily adapt to indirect natural light conditions or medium and low shade.
Bibliography and references
- Japan Quintero, Jose. (1985). Cultivation of parsley and mint. Ministry of Agriculture, Fisheries and Food. Madrid Spain.
- Gonzalez Revro, Liliana. (2012). Herbs for your kitchen. Original and easy to grow options. LEA editions. Buenos Aires, Argentina.
- Membreño Gutierrez, Ronald Geovanny. (2019). Behavior of the vegetative development of peppermint (Mentha spicata L.) using three substrates at nursery level. National Agrarian University. Managua Nicaragua. Reproduced from: https://repositorio.una.edu.ni/4039/1/tnf01m533c.pdf
- Orellana Salazar, Arlene Clara. (2017). Characterization of the essential oil of peppermint (Mentha Spicata l.) obtained by the steam drag method. National University of Callao. Callao, Peru. Reproduced from: http://repositorio.unac.edu.pe/bitstream/handle/UNAC/3612/Orellana%20Salazar__titulo%20quimica_2017.pdf?sequence=1&isAllowed=y
![Photo of Prune a Lavender: [Dates, Tools and Ways to Do It]](https://www.complete-gardening.com/wp-content/uploads/2022/08/prune-a-lavender-dates-tools-and-ways-to-do-it-390x220.jpg)
![Photo of Almond Pests and Diseases: [List and How to Fight Them]](https://www.complete-gardening.com/wp-content/uploads/2022/08/almond-pests-and-diseases-list-and-how-to-fight-them-390x220.png)
