Nabicol or Kohlrabi: [Cultivation, Care, Irrigation, Substrate and Pests]
Important points when sowing Nabicol
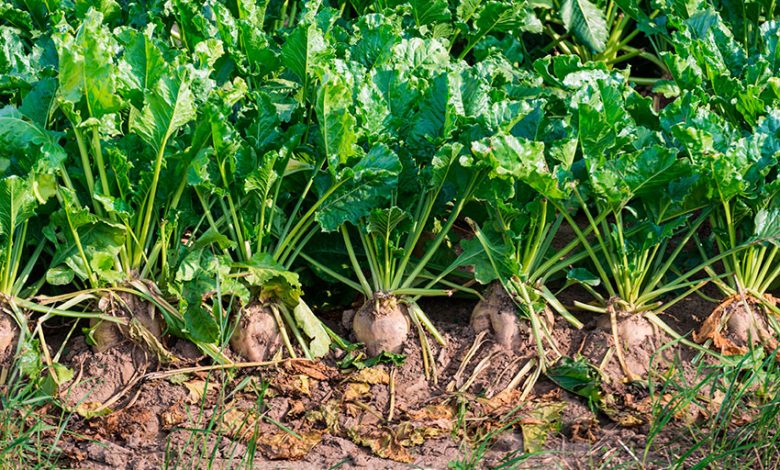
 When? Preferably, it should be sown at the beginning of spring or when summer ends and autumn enters. May to September is the indicated period.
- Where? They really like to live in cool or temperate climates. It supports a good daily dose of sunlight, but never excessive, because then it will have a bitter taste.
- How do we prepare the land? Fertile, well-drained soil is ideal. Free of rocks, well carved and never flooded. Add rice husk so it doesn’t compact.
- How do we sow? Direct sowing of the seed in the garden is the best. Measurements: 1/2 inch deep and 1 inch apart, in several rows 12 inches apart. Water them daily by dripping.
- How do we pay? An excellent fertilizer isearthworm humus. Apply every 15 to 20 days.
- When to harvest? After 90 days, they are harvested. It can be done in winter if sowing was at the end of summer.
- Ideal temperature? The ideal temperature ranges from 12 to 27ºC, although there are cultivars that adapt perfectly well to moderate winter temperatures.
- How do we water? Irrigation will be constant, but not excessive, to obtain the best flavor of this exquisite tuber. By drip, the result will be magnificent.
- Diseases and pests? Cabbage weevils, cabbage fly, slugs, cabbage caterpillars,gray grub and aphids will likely need to be sprayed and removed
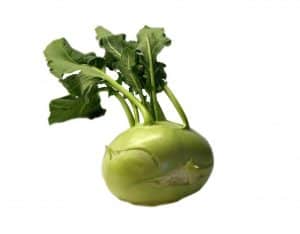
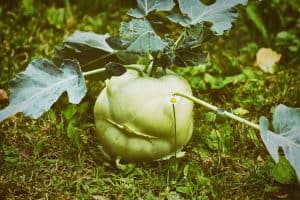
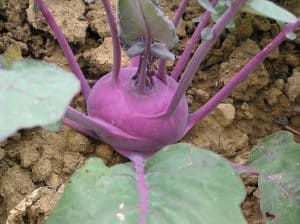
What is Nabicol?
 The Turnip, Kohlrabi or Brassica naprobrasicca, as its name indicates, is a hybrid cruciferous tuber that emerged from the cross between the turnip and cabbage or cabbage, thanks to cultivars from Europe and North America.
It can reach about 25 centimeters in height and is capable of expanding or extending by about 35 centimeters, with a root 10 centimeters in diameter and 10 in depth.
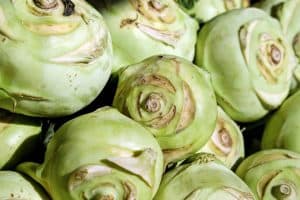
It has various culinary applications. Its leaves and roots are used with the same treatment in gastronomy, given to spinach and chard, it is used in salads, baked goods and the tuber is also used as a worthy substitute for potatoes.
And it boasts high nutritional properties that favor the strengthening of the immune system and prevent the appearance of serious diseases such as cancer, thanks to a high content of vitamins, especially C, minerals and other very powerful nutrients.
Its seed is used to the maximum, due to its high content of vegetable oil used to make varnishes, lubricants, oils and insect repellents, among other applications for the pharmaceutical industry.
Where should we plant the rutabaga?
 This plant needs to live in cool or temperate climates, so that it can develop in a maximum of 90 days. In extreme temperatures, especially very hot, its fruit and leaves turn bitter and do not reach large dimensions.
When do we grow turnip greens?
This tuber is quite resistant, it withstands low temperatures and even frosts, but it is advisable to cultivate it at the beginning of spring, when temperatures have already risen.
Or it can also be done at the end of summer, to harvest in winter and enjoy delicious dishes.
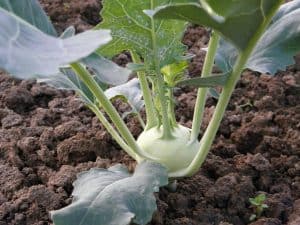
How do we prepare the land?
 The soil must be rich in nutrient content, so that the plant takes advantage of all the energy load and can grow healthy, fully.
Another condition of the soil must be its great permeability, free of rocks or stones, because this curious tuber does not support waterlogging.
They damage it a lot, so you must always have a well-tilled soil, very rich in organic matter and reinforced with a good enriched fertilizer.
It is very important that the soil is always moist, in order to guarantee good quality tubers. Avoiding ponding is essential, so a drip irrigation system will be more than enough to protect a good harvest.
A good fertilizer, preferably earthworm humus, every 15 to 20 days will keep the soil optimal for cultivation.
And the pH of the soil should be in a range between 6.0 to 7.5. You can use lime to raise the pH or sulfur if you need to lower it, if the measurements are not in your favor.
How to plant nabicol step by step?
It is necessary to follow, step by step, simple instructions to plant turnip greens in a garden in your home.
The most advisable thing is to make a direct sowing, it is more successful than making subsequent transplants of seedlings achieved with the germination of seeds.
However, both methods are valid as long as the following steps are met:
direct sowing
- When the seed is planted directly in the ground, previously calculate the following distance: about 12.5 millimeters deep (1/2 inch) and about 25 millimeters (1 inch) between each one. Also, each row to have a separation of about 30 centimeters.
- As the seedlings grow, they are watered daily, but without excessive water baths, because they must be prevented from rotting.
- You also have to eliminate the weeds that cross between the seedlings, because they steal nutrients and water.
- When the seedlings are about 5 inches tall, it is good to spread a thin layer of organic mulch on the ground around the seedlings to discourage weeds and promote soil moisture.
Planting by Transplants
Materials
- A seedbed.
- loose, permeable soil substrate. (Mix humus with rice husk so that it does not compact).
- Seeds.
- Sprayer to irrigate water daily.
Process
- Apply the substrate to all the cavities of the seedbed and distribute the seeds in a suitable proportion immediately afterwards, trying to achieve an equal distribution. About 3 or 4 seeds will be fine for each hole.
- Water with generous sprays every day, but avoiding that the seedbed gets too wet. You have to keep the substrate moist but never soaked with water.
- About 22 days later, or a little less, the sprouts will be ready to be extracted individually from the seedbed, taking great care of their roots, in order to be taken to their definitive place of permanence in the orchard.
- Open a hole about half an inch deep, in fertile soil, which will be destined for each little plant, taking care that there is a space between each tuber of about 8 to 10 centimeters, so that they do not steal nutrients from each other.
- Apply irrigation daily, without allowing the substrate to get too wet, in a cool climate and with indirect sunlight, in partial shade.
What care does the rutabaga need?
 This vegetable deserves good daily doses of radiant sun, but also some cool and partial shade.
- A good substrate rich in organic matter, such as leaf soil enriched with earthworm humus and with a good dose of rice husk so that it does not compact, is ideal. The most important key to a good flavor lies in rich soils, very well nourished.
- Irrigation is another very important factor to prevent the taste from being too bitter. An ideal drainage, which never becomes saturated, is ideal. And if the soil dries out, then the growth slows down and the taste will be very unpleasant.
- An ideal temperature for rapid growth is between 12ºC to 27ºC, or when you notice that the stem has reached about 3 inches in diameter.
What pests and diseases does it have?
Cabbage aphids and maggots, cabbage weevils, slugs, cabbage worms, and gray bollworms are the most common critters that attack this wonderful cultivar.
It is necessary that a constant review of the orchard is always carried out so that worms that usually bite the leaves are also removed, but this is not the norm, rather the exception, because this tuber has in its favor a rapid ease of growth, the harvest will also arrive shortly, so it is very difficult or rare for a plague to seriously affect it, to the point of killing it.
![Photo of Tuta Absoluta o Polilla del Tomate: [Cómo Identificarla y Combatirla]](https://www.complete-gardening.com/wp-content/uploads/2022/08/tuta-absoluta-o-polilla-del-tomate-como-identificarla-y-combatirla.jpg)

![Photo of White Soil Worm: [Characteristics, Detection, Effects and Treatment]](https://www.complete-gardening.com/wp-content/uploads/2022/08/white-soil-worm-characteristics-detection-effects-and-treatment-390x220.jpg)
![Photo of Kiwi Pests and Diseases: [Detection, Causes and Solutions]](https://www.complete-gardening.com/wp-content/uploads/2022/08/kiwi-pests-and-diseases-detection-causes-and-solutions-390x220.png)